Country Sourdough Bread is a Tartine type Artisan bread, made with just three ingredients, flour, water and salt. This basic recipe is your new best friend.

Country Sourdough Bread – Old World Style
There’s nothing like fresh, homemade sourdough bread. I bake bread at least two-three times per week.
A note about gluten intolerance – Since I have been baking bread, I no longer have a strange feeling in my stomach after eating bread. I’m sure that is the feeling others have been getting after eating store bought bread and may think they are gluten intolerant. I know so many people who have switched to homemade bread and have discovered that they aren’t really gluten intolerant.
The problem was overly processed bread sold at grocery stores and the use of commercial yeast. Store bought bread is made so quickly and with such shortcuts, it’s no wonder people think they are gluten intolerant. This is not the case for everyone, but give it a try and see if you can tolerate this Country Sourdough Bread.

Cast of Ingredients for Country Sourdough Bread – Old World Style
Using your own Sourdough Starter, which is a natural fermentation method totally allows most people to once again enjoy bread made with bread flour and all purpose flour. This recipe is my basic recipe and it’s a scaled down Tartine bread basically.
The ingredients to an incredible loaf of the most delicious bread you have ever had, are few.
For more help and lively discussion, join my Facebook Group, Natural Fermentation Real Sourdough Bread Bakers.

Sourdough Starter Ready for Using
You will want to feed your starter the night before, by discarding (removing some starter) and then feeding. Leave it out all night in a warm place, covered. It should triple in size and then fall back a bit.

Mixing up the Levain
If your jar of Starter that you keep in the refrigerator is not very active, you could instead of feeding it and letting rise overnight, make a Levain (pre-ferment).
Jump to Section
What is a Levain
- Just a term meaning that you removing some sourdough starter from your jar and feed that in a bowl, rather than feeding your jar of starter.
- A levain is a mixture of Sourdough Starter, flour and water that is prepped and then allowed to grow.
- There is no commercial yeast in a Levain. This will produce a stronger active Starter.

Fermenting the Levain
The Original Danish Dough Whisk does a great job of mixing up the flour and water.
Cover the Levain (or your jar of Starter) with a Flour Sack Towel and let it sit overnight to ferment.

Weighing the Flour is Important
The next morning, pull some Starter out of the jar or use the levain you made the night before in a food safe container and then weigh in the flour and the water.
I like to use the Baker’s Math Kitchen Scale, as it is extremely accurate and will also weigh in Baker’s Percentages.
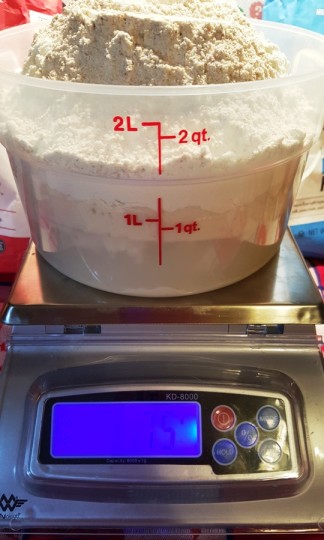
If you are wanting to add some other types of flour, like whole wheat or spelt, don’t add more than 75 grams. Those flours are lower in gluten and would need more adjustments for the recipe.

Gentle Mix in the Water to the Flour
Mix it up well with The Original Danish Whisk, so that there is no flour left separately in the bowl.

Cover the Dough with a Flour Sack Towel and Autolayse
Cover with a Flour Sack Towel or whatever you like and autolyse for at least 40 minutes. You can go longer if need be.
What is Autolyse?
- It is a simple procedure. The water and flour combine with each other and will make the dough easier to use.
- During this time, the flour will absorb the water and become fully hydrated. Doing this will activate the enzymes in the flour. They stimulate the proteins and this is where the gluten development begins.
- While this is happening, the enzymes will break the starch down into simple sugars. Those simple sugars will feed the yeast during the bulk proofing time.
It is important not to knead at all during this time. Over kneading may result in a dough that is over oxidized, which can change the color of the finished loaf of bread.
This may sound complicated, it is not. Basically, after combining the water and flour, just let them sit for about 30 minutes.

The Salt and the Rest of the Water is Added AFTER Autolyse
If you want to add Malted Powder, now is the time, along with a bit more water and salt. This is called a Double Hydration.

Pinch the Dough to Incorporate Further
Pinching the dough to help further incorporate the flour and the water without kneading is a good practice.
After one hour of rest, your dough will be visibly taller.
This is when the stretch and fold starts!

Beautiful Dough Full of Bubbles
After several hours of stretch and folds, the dough is going to show lots of gas bubbles!
What is Stretch and Fold?
Stretch and fold is the act of stretching out or pulling the dough and then folding it back over itself. This method allows the gluten to develop without over working the dough.
The dough is then turned a quarter of a turn and the act is done again.

Turn the Dough Out to Pastry Board
Place the dough on your lightly floured Pasty or Bread Board and grab your Bench Knife.
Pro Tip: Any time you touch the dough to knead, stretch and fold or shape, always let it bench rest for 30 minutes.

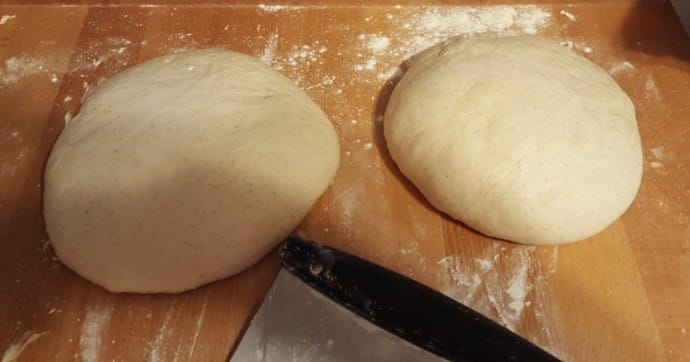
Use a Bench Knife to Divide the Dough into Two
Weigh the dough and then using a Bench Knife, cut the dough into two equal pieces.

Fold the Dough Like an Envelope
Pull the bottom of the dough towards you and then fold it up. Fold in the sides, like an envelope and then pull the top over the folds.
Fold the Dough Like an Envelope
Prior to shaping the dough into a ball, it needs to first be folded into an envelope, so to speak.
How to Prepare Dough for Shaping
Stretch the dough from the bottom and pull it up towards the top of the ball of dough. Then stretch the sides and pull them together in the middle.
finally, stretch the top of the dough over to the bottom of the dough.

Form a Tight Ball with Pastry Knife and Hand
Shaping the Dough
With your Bench Knife in one hand, rotate the dough to form a tight ball.
The dough will slightly stick to your pastry board, allowing you to rotate the ball around and around until it becomes smooth and taught.

Shape Both Pieces of Dough into a Taut Ball
Do the same to the other piece of dough.

Resting the Shaped Dough
Cover the dough and let it bench rest for 30 minutes.
I love my Snow River Pastry Board. When I first got it, I applied four rounds of John Taylor Butcher Block Conditioner Oil and then two coats of Clark’s Cutting Board Finish Wax. Once a month, I apply another coat of the Oil and every couple of months I apply the Wax after oiling.
The dough will be puffy. Dust some flour over the top and with your Bench Knife, flip it over and reshape, this time tighter. Using your Bench Knife as a guide to scrape along the board, pull the dough towards you, which will tighten the dough even further.
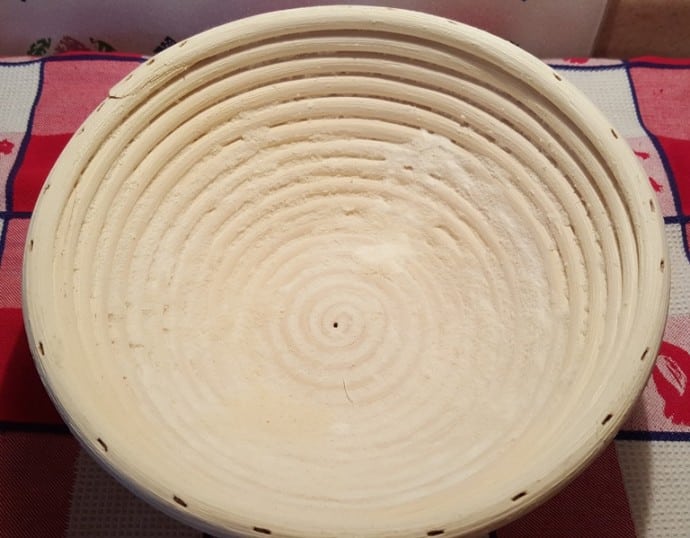
Using rice flour and/or wheat flour, dust your Banneton. Alternatively, you could use a linen cloth inside the Banneton, if you do not want the swirls to show on your bread.
Pro Tip: Make your own rice flour. Use a high speed blender like a VitaMix 7500 or Instant Pot Ace 60 Blender and add white rice. Grind until it becomes a fine flour!
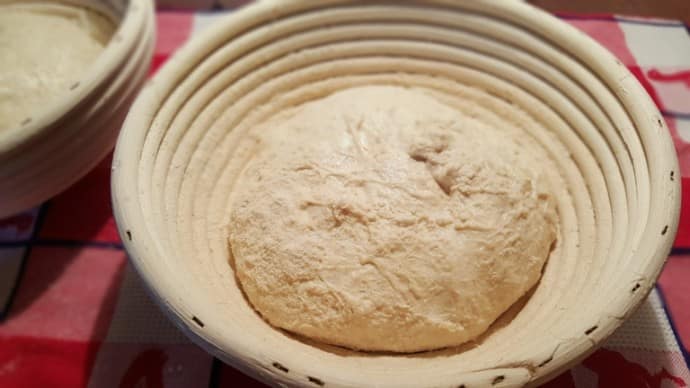
Using your Bench Knife, place seam side up, in two Banneton Proofing Basket. Sprinkle Rice flour over the top of dough, cover with plastic wrap and place in refrigerator overnight.
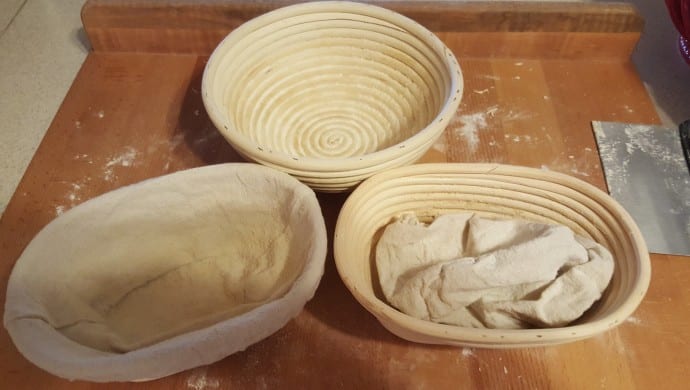
I sometimes divide half the dough in half and shape into mini Boules.
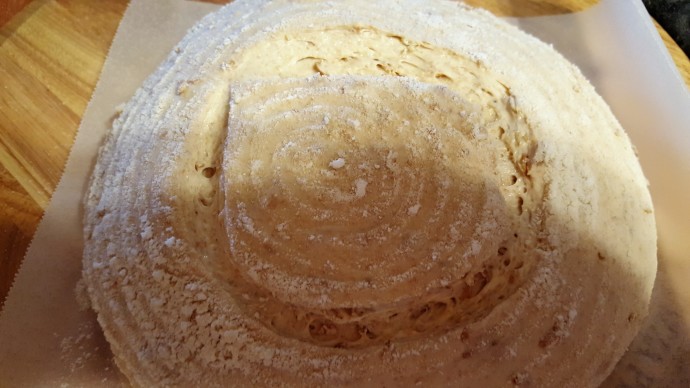
Score your bread with a Bread Lame right before you are ready to put into your oven.
What is Scoring Dough?
- To score the dough, is simply to take a lame, which houses a razor blade or very sharp knife and cut into the top of the shaped dough right before baking.
- This helps the dough rise and expand while in the oven.
Razer blades are super cheap and I buy them in packs of 100.
Baking the Dough
It is important to preheat the oven with the baking vessels, such as a Cast Iron Combo Vessel inside of the oven. The baking vessel should be as hot as the oven. Place both top and bottom of your Heavy Duty Cast Iron Bread Pan (MY FAVORITE) or (5 Quart Cast Iron Dutch Oven) in your oven and preheat oven to 500 Degrees F for one hour.

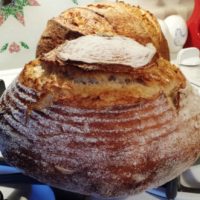
Country Sourdough Bread
Some people like blisters on their bread, others do not. I happen to love blisters on my bread.
How to Get Blisters on Bread
- Take a bottle spritzer filled with water and spritz the top of the top prior to putting the lid on the backing vessel. I use these beautiful blue glass spritzing bottles as they are guaranteed for life. I got tired of my spray part of plastic bottles breaking all the time.
The bread needs to cool prior to cutting, so that the inside of the bread finishes steaming. I use a Stainless Steel Baking Rack on my counter and place the hot loaf of bread on it to cool. Once cool, slice away and enjoy.
Dunk a piece of bread into the delicious broth from my Pressure Cooker Copycat Killer Shrimp Recipe. Also delicious with a hot bowl of Pressure Cooker Armenian Lentil Soup!
More Sourdough Bread Recipes
- Japanese Hokkaido Milk Hotdog Buns
- Hokkaido Milk Sandwich Loaf {Sourdough – Natural Fermentation}
- Oats and Seeds Sourdough Country Loaf
Kitchen Equipment and Essentials
- Bakers Math Kitchen Scale with Percentages – everyone should own this scale
- Cambro 4 Quart Mixing Proofing Bowl
- Rösle Stainless Steel Flat Whisk– a MUST have, probably my most used utensil
- The Original Danish Dough Whisk
- Pastry Board
- Porcelain & Bamboo Salt Box with Spoon
- OXO Good Grips Bench Knife
- Flour Sack Towels
- Bread Scoring Lame
- Round Banneton Baskets
- Heavy Duty Cast iron Bread Pan
Caring is sharing! If you would like to support This Old Gal, please share this recipe on Social Media, so that I can continue to bring you more wonderful recipes!
If you share a picture of something you make from our blog, tag it with #thisoldgalcooks so we can see it. We might feature it on Instagram! It makes my day when I see you’ve made one of our recipes!
Here is your handy printable recipe:
Ingredients
Levain (if Starter is active, skip this step)
- 1 Tablespoon Sourdough Starter 100% Hydration
- 75 grams All Purpose Flour
- 75 grams Whole Wheat Flour
- 150 grams Warm Water
Dough - Autolyse
- 150 grams Levain (or 150 grams Fed Starter)
- 525 grams Fresh Water (or potato water*)
- 675 grams Bread Flour
- 75 grams Whole Wheat Flour
After Autolyse
- 15 grams Sea Salt
- 37.5 grams Warm Fresh Water (or potato water*)
Optional
- 10 grams Malted Powder optional
Recommended Products


Instructions
Day One - Making the Levain from your Sourdough Starter
- If your starter has been fed the day before, then skip this step and go right to the "Day Two" step.
- The night before mixing up the dough, remove 1 Tablespoon Starter from your jar of Sourdough Starter and place into a bowl.
- Add all purpose flour, whole wheat flour and warm water.
- Combine until flour is absorbed.
- Place plastic wrap or use a baggie and cover. Leave in a warm spot overnight.
Day Two - Mixing and Stretch & Folds
- In a mixing vessel add Levain (or fed sourdough starter, water and flour and mix with fingers just until incorporated. Do not over mix.
- Cover and let Autolyse for 30-40 minutes. (leave the dough undisturbed)
- Add salt and water and integrate by pinching the dough with your finger (water will not immediately integrate, but will with each stretch and fold).
- Think of the bowl of dough as a square. You want to pull each side of the dough to about 3/4 to the other side. Turn the bowl after each "stretch and fold" until you have stretched and folded all four sides.
- Over the next three hours, do this stretch and fold every 30-45 minutes.
- The dough will change from a slipper and sticky dough to a billowy dough with air pockets. DO NOT PUNCH DOWN THE DOUGH at any time.
- At the end of three hours, The dough will be elastic and resilient and be able to pass the window pane test. If it is not not, do one more stretch and fold.
- Once the dough is billowy, cover the dough and bench rest in the bowl for at least an hour or until it has risen by at least 30 percent.
- Transfer dough to a work surface and dust top with flour.
- Cut dough into 2 equal pieces and flip over.
- Fold the cut side of each piece up onto itself so the flour remains on the outside.
- Using your bench knife in one hand, rotate the dough and work it into a very taut round. Set the first dough aside and do the same with the next dough.
- Cover the dough with a flour sack towel and bench rest 30 minutes.
- Dust rounds with whole-wheat flour or rice flour.
- Flip them over so floured sides are facing down.
- Take first round and fold it into itself like an envelope.
- Second shaping - Flip dough over and shape into smooth, taut ball by pulling the dough towards the body to tighten. Repeat with other round.
- Dust two Round Bannetons or Oval Bannetons with white/whole wheat or rice flour.
- Transfer rounds, seam-side up, to prepared baskets. Cover with a towel or plastic bag and place in refrigerator overnight, 10 to 12 hours.
Day Three - Baking Day
- Remove dough from refrigerator and proof (allow to rise) at room temperature for 1-2 hours.
- Place baking stone, baking vessel or Dutch Oven into oven and preheat to 500 degrees at least 4- minutes prior to baking.
- Dust top of dough, still in the Banneton, with rice flour or wheat flour.
- Remove baking vessel from oven and turn dough into vessel. (Alternatively, turn dough onto parchment paper, score and then place on pizza stone or into baking vessel in oven.)
- With a bread lame, score (slice into dough about 1/2 inch) the dough. Score in a circle or make an X on the top of the dough.
- Cover the dough and bake for 20 minutes.
- Remove cover and bake an additional 15-20 minutes.
Notes
What is Autolyse?
- Autolyse is a simple procedure. The water and flour combine with each other and will make the dough easier to use.
- During this time, the flour will absorb the water and become fully hydrated. Doing this will activate the enzymes in the flour. They stimulate the proteins and this is where the gluten development begins.
- While this is happening, the enzymes will break the starch down into simple sugars. Those simple sugars will feed the yeast during the bulk proofing time.
What is Stretch and Fold?
Stretch and fold is the act of stretching out or pulling the dough and then folding it back over itself. This method allows the gluten to develop without over working the dough. The dough is then turned a quarter of a turn and the act is done again.Make Your Own Rice Flour
With a high speed blender like a VitaMix 7500 or Instant Pot Ace 60 Blender add 2 cups of white rice. Turn on blender and grind until the rice becomes a fine flour!*How to Make Potato Water
- In saucepan, add 500 grams diced potatoes and 1 kilogram of water. Cook until very soft.
- Using a bowl and a mesh strainer, pour contents of saucepan through a strainer into the bowl. Squeeze potatoes to get every drop of liquid
How to Create Blisters on Bread
- If you want the bread to have blisters on the crust, take a spray bottle of water and spray the dough after putting the dough into the oven.
- Place the cover on the bread. This will create steam for the outside of the bread and allow blisters to appear on the crust.
Nutrition
PIN this Country Sourdough Bread!
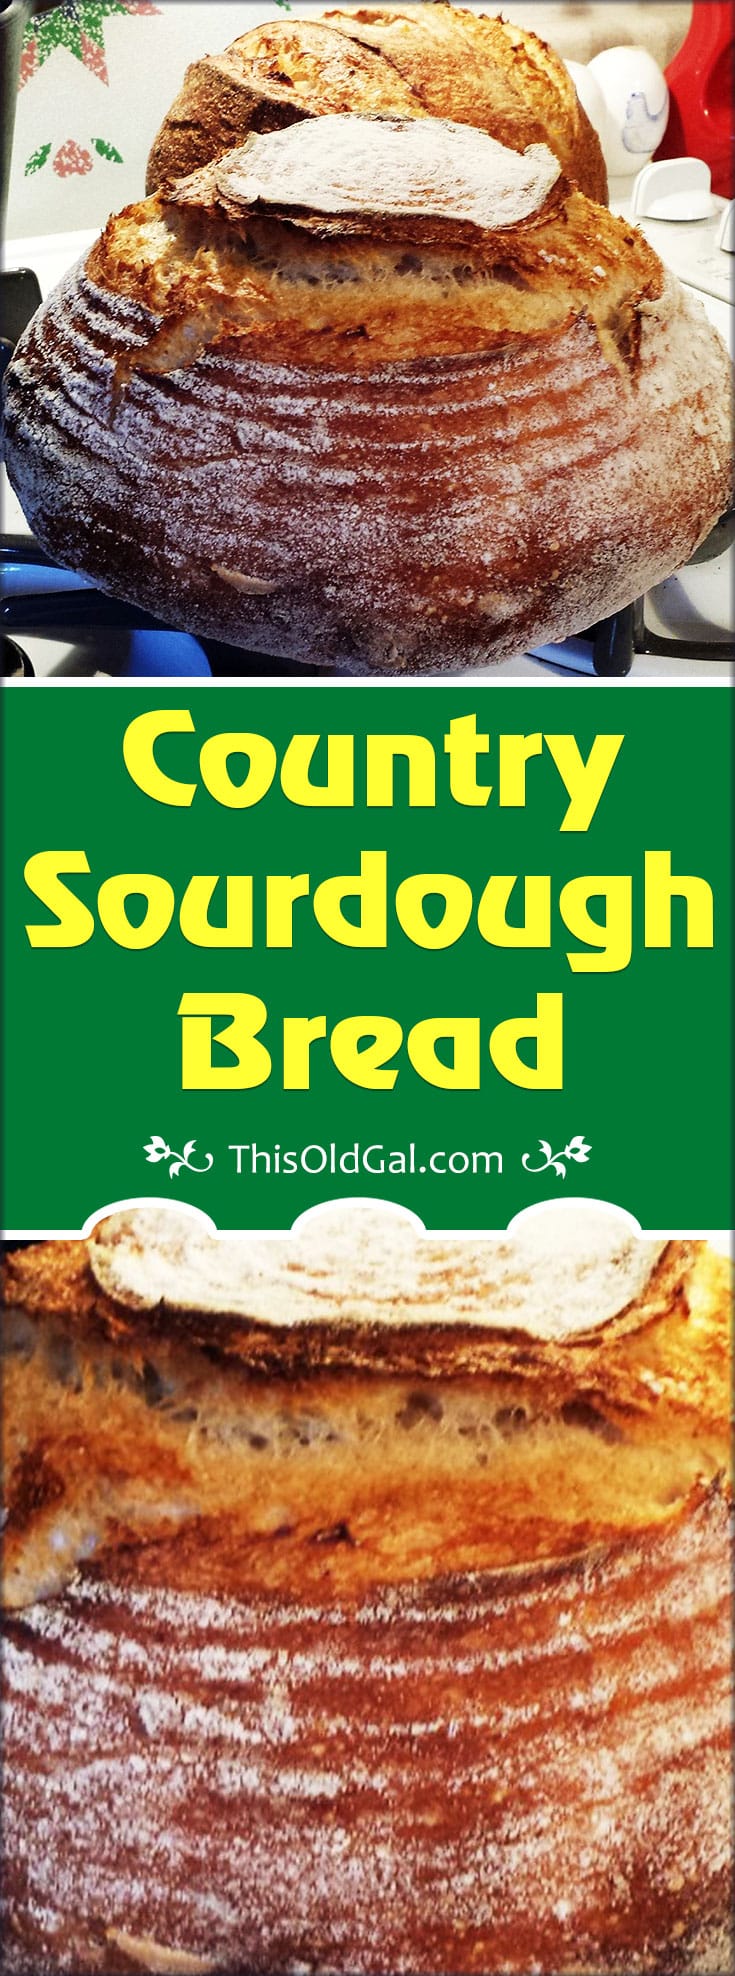
Country Sourdough Bread

Happy Sunday to you
Was looking for details for baking sourdough loaf in instant pot.
Am I missing something?
My dough isn’t rising by at least 30% (day 2, step 8) and it’s about bedtime. The starter gets bubbly and looks good but I’ve had the hardest time getting the actual dough to rise. And whenever I’ve tried refrigerating it overnight, in the mornings it looks just like when I put it in. I saw your recipe and thought I might have better luck (because I love your IP yogurt) but I don’t think so. Any idea what the problem could be? (I don’t have Facebook to join your group there.)
Hi Diane. Are you weighing your ingredients? How old is your starter? Jill
Prior to the atual recipe, you give detailed instructions, in reference to the 3 hrs of stretch and folds I only notice one 3 hrs set of stretche and folds in the details before the recipe. However, the actual recipe has you do two sets of stretch and folds in steps 4 and 6 for a total of 6 hrs of them. Am I misreading this? I’m in the middle of making my bread for the first time – just mixed (autolyse) and now ready to add salt and extra water. Sorry, I’m just not sure about this. Thanks.
Anita, sorry about that. I had updated the recipe and forgot to delete that extra paragraph. Just one set of stretch and folds. Jill
Ok, thanks, i’m glad, b/c I ended up doing just 1 set of 3 hr folds. Thanks for getting back to me in a timely manner 🙂 I also sent a link to a friend with whom I’m sharing some starter with. Enjoy your blog. I hope my bread turns out, it looks good so far!
You are very welcome, Anita. I can’t wait to hear about the final results. Jill
Thanks for the tip about making my own rice flour. I could never bring myself to pay that much for it in the store. I’m hoping my coffee grinder will be able to make the flour. I’m getting closer to finally making this recipe.
It should work with the grinder. enjoy. Can’t wait to hear about your results. Jill
It’s bake day! Do you really bake this at 500 degrees the whole time?
Do you bake in the same bowl you let the bread rise in?
No, read the recipe please. Jill
Hello – I’m exited to try this recipe with my new starter! Can I use the leftover whey from making yogurt instead of the potato water?
Yes you can! Jill
Can you proof this in the instant pot? Can you use whey instead of water?
After bulk rest, dough is way too runny. What do I do? I used whey and AP Flour and some spelt. I put it fridge hoping it comes together tomorrow.
Following this recipe, at the day 2, at step 6/7 the dough is so sticky it’s impossible to work with. What’s the problem? Too little flour?
I have used the quick Instant Pot version recipe using whey. Would whey be acceptable to use in place of the water in THIS recipe as well. I actually have a starter all ready to go but wasn’t sure how it would go with a fermented starter AND whey. Thanks!
Yes, whey is great in this recipe. Jill
Thank you for the recipe. Pat Langner forwarded it to me. She is part of your instant pot group. It appears that use live in the USA. Did you use standard flour found in the US?
Geri, I use All Purpose, Whole Wheat, Spelt, Bread Flour, this recipe. Jill