Before you get started making a Cheesecake, please read this article, Perfect Pressure Cooker Cheesecake Tips & Guide, to learn to make Perfect Cheesecake.
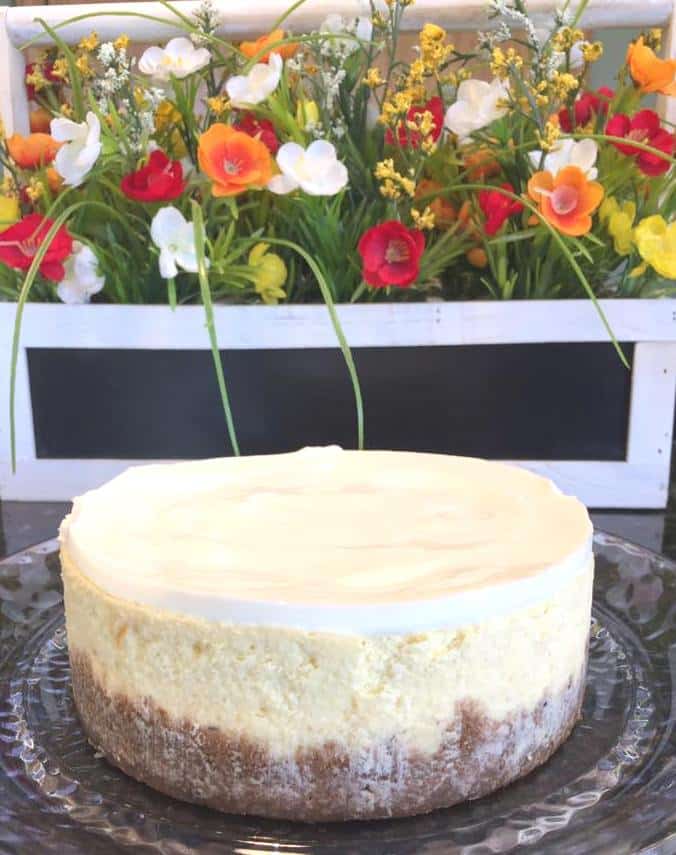
Perfect Pressure Cooker Cheesecake Tips
This article on Perfect Pressure Cooker Cheesecake Tips will guide you though the steps, so that you can make Perfect Cheesecake in your Pressure Cooker.
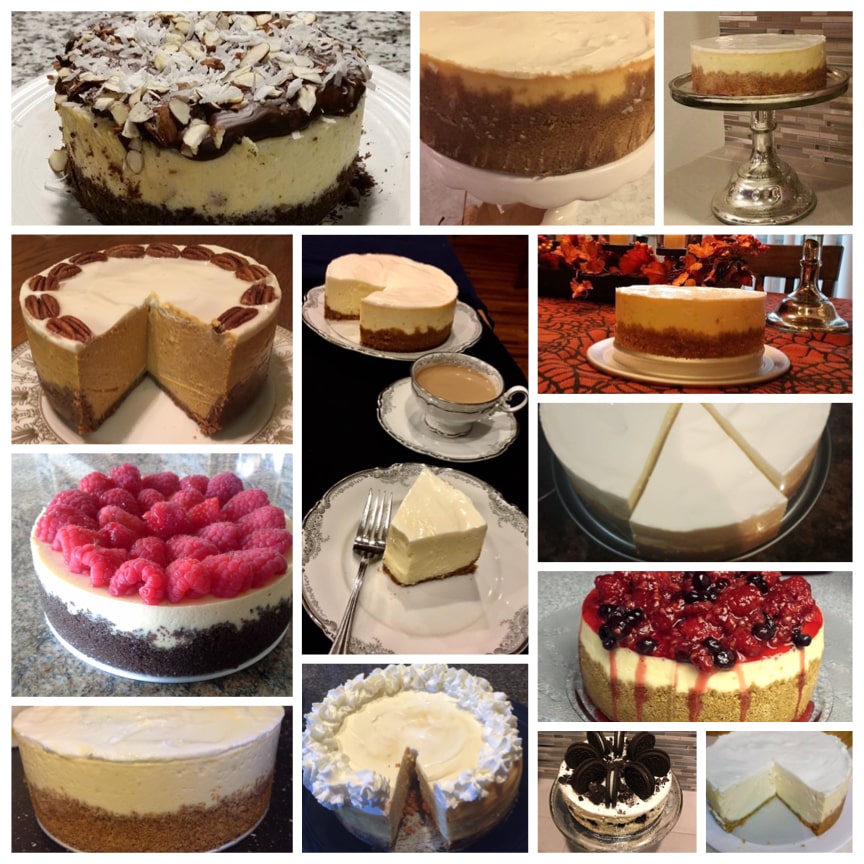
Pictures courtesy of my readers!
All the completed Cheesecakes in this article, are Cheesecakes made by my wonderful readers. Their Cheesecakes are gorgeous! Many thanks to all those who submitted photos to be used in this article!
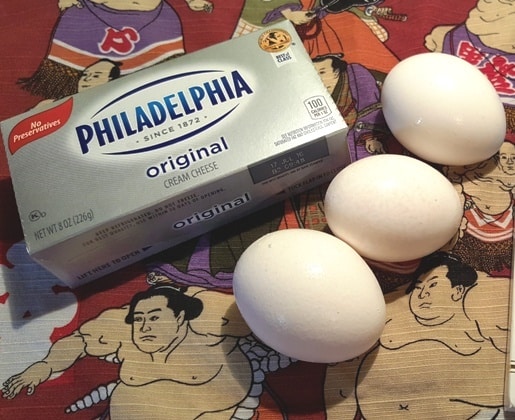
Remove Cream Cheese and Eggs from Refrigerator
For the best Cheesecake, brand does matter. I have tested several store brands and there is a significance difference to using Philadelphia Brand Cream Cheese. While your Cheesecake will still taste great with an off brand, the taste will be far superior using Philadelphia Brand.
The first thing you will need to do for a smooth and creamy texture, is to allow your cream cheese and eggs to get to room temperature. Beating a fat, such as cream cheese or butter until it’s soft, light and airy is called creaming.
If you add eggs right from the fridge to a creamed fat, it’ll cause the fat to re-solidify, making the batter look lumpy or curdled.
The eggs don’t need to be room temperature, but taking the chill off of them helps keep the fat from hardening again.
So, at least 30 minutes before you plan to assemble your cheesecake, remove the cream cheese and eggs from the refrigerator and allow them to come to room temperature. If you live in a cooler climate, try putting your cream cheese and eggs into your oven, with the oven light on. Another warmer place in the house, is on top of your dryer.
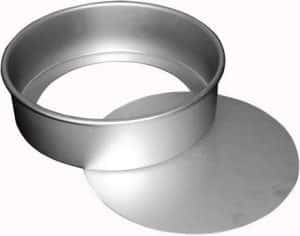
Fat Daddio’s Cheesecake Push Pan (All Sizes)
Choose your Cheesecake Pan. For Hard Anodized, my preference is the Fat Daddio’s Push Pan for several reasons. I like the smaller foot print, which means that I can put a larger pan into my Pressure Cooker. I also find it easier to clean than a Springform Pan because of the locking mechanism.
The only down side to a Push Pan, as I see it, is that the sides won’t come out as clean looking as they do using a Springform Pan. The pushing action in releasing the Cheesecake, will ‘smudge,’ for lack of a better word, the sides of the Cheesecake, as you can see in the first photo.
That being said, this Fat Daddio’s Push Pan is my go-to Cheesecake Pan.
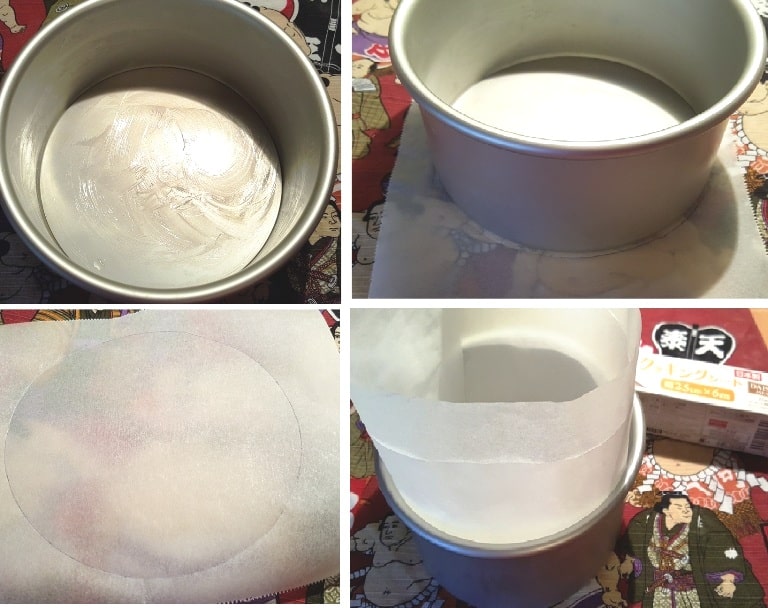
Line Cheesecake Pan with Parchment Paper
The smudging problem, however, is easily remedied. Placing Parchment Paper, not only on the bottom of the Pan, but lining the sides as well, will eliminate the smudge. I only do the side lining on my Japanese Cotton Cheesecake. For all my others, I just use Parchment Rounds for the bottom. It is up to you to decide your preference. 🙂
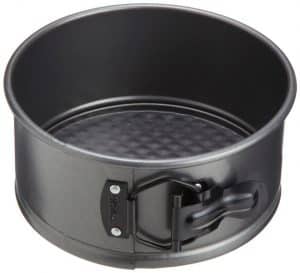
Wilton 6″ Springform Pan
The advantage of a Springform Pan, is that you can easily unlatch the pan and the rim will come right off and leave a nicer side to the Cheesecake.
I still suggest using use Parchment Rounds for this option. The latch bothers me. I wonder what is lurking inside the slide part, that I cannot see. I’m a clean fanatic, so I think about stuff like that.
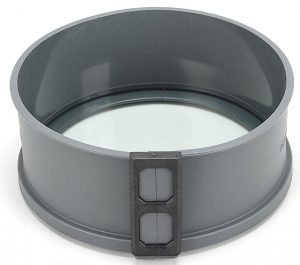
Instant Pot 6.5″ x 2.5″ Silicone Springform Cake Pan, Tempered Glass Base
The third option and it may be the best of both Worlds, is this new Instant Pot Springform Pan, which is new on the market. The base is made of glass, which is nice, as you won’t have to worry about scratching it on removal of the Cheesecake.
The only downside, as I see it, is that you will need to add 5 more minutes to your cook time, as Silicone does not conduct heat as well as the Anodized Aluminum. But, it is a small price to pay in exchange for SILICONE! No aluminum. The sides easily release. As much as I love my Push Pan, this is one I would like to try! The price tag makes it very competitive, so if you try this new Cheesecake Pan, let me know what you think.
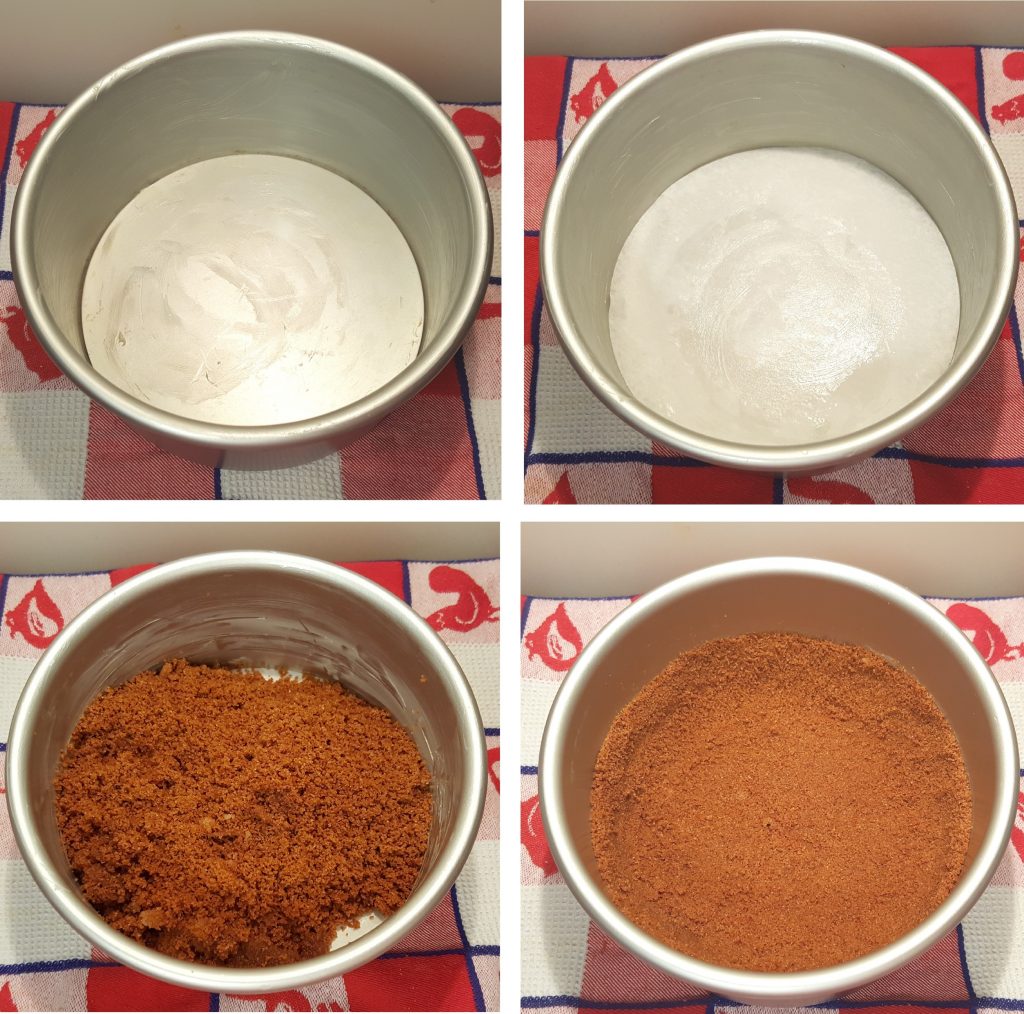
Prepare the Cheesecake Pan
I prefer to use a 6 inch Fat Daddio’s Push Pan over a Spring Form Pan, because clean up is so very easy, but some people prefer a Spring Form Pan.
It is very important to generously grease the sides and bottom of your Cheesecake Pan. I also grease the Parchment Round. This will help in the removal of your Cheesecake. Many people leave their Cheesecake in the Cheesecake Pan overnight. If you don’t have parchment, don’t worry. It just might be a little more difficult to separate the cake from the bottom of the pan.
Press crumb mixture into pan using a Fox Run Tart Tamper or your fingers, forming a neat border around the edge and slightly up the sides. Place your pan into the freezer for at least 20 minutes, while preparing the filling.
Prepare the Crust
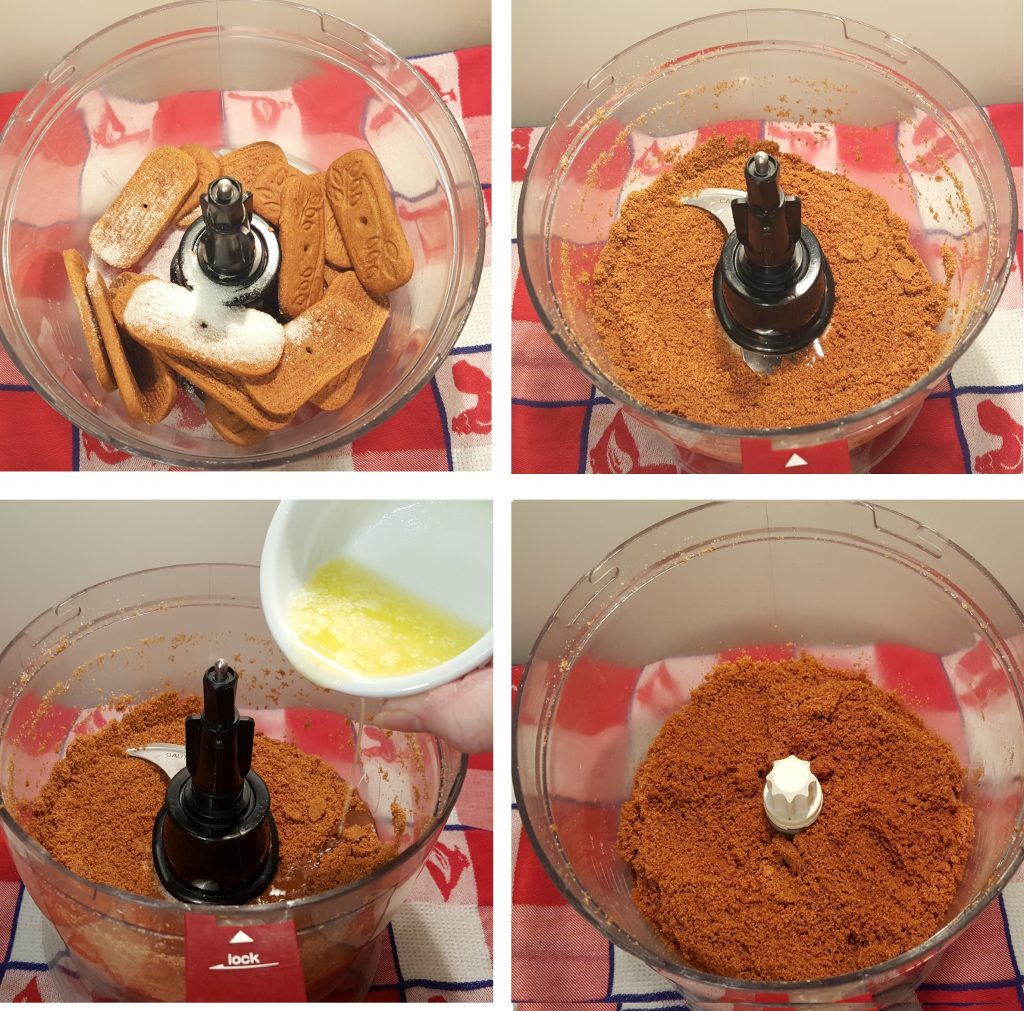
Making the crust for a cheesecake is very simple. Crispy cookies, graham crackers, Ritz Crackers, all work well. You can buy cookie crumbs, but it is just as easy to crush them yourself.
I use my Cuisinart Large Food Processor to crush my cookies. Crusts usually just consist of cookies, sugar and butter. Some recipes will use nuts, spices and extracts. Make sure to add your dry ingredients first and process until you have crumbs. Then add the melted butter and any extracts called for in your recipe.
If you don’t have a Food Processor, take a large baggie and put the cookie crumbs inside and seal the baggie. Then use a rolling pin, heavy spoon or other hard object and crush the cookies.
Press the Crust Mixture into Cheesecake Pan
This part is very, very important.
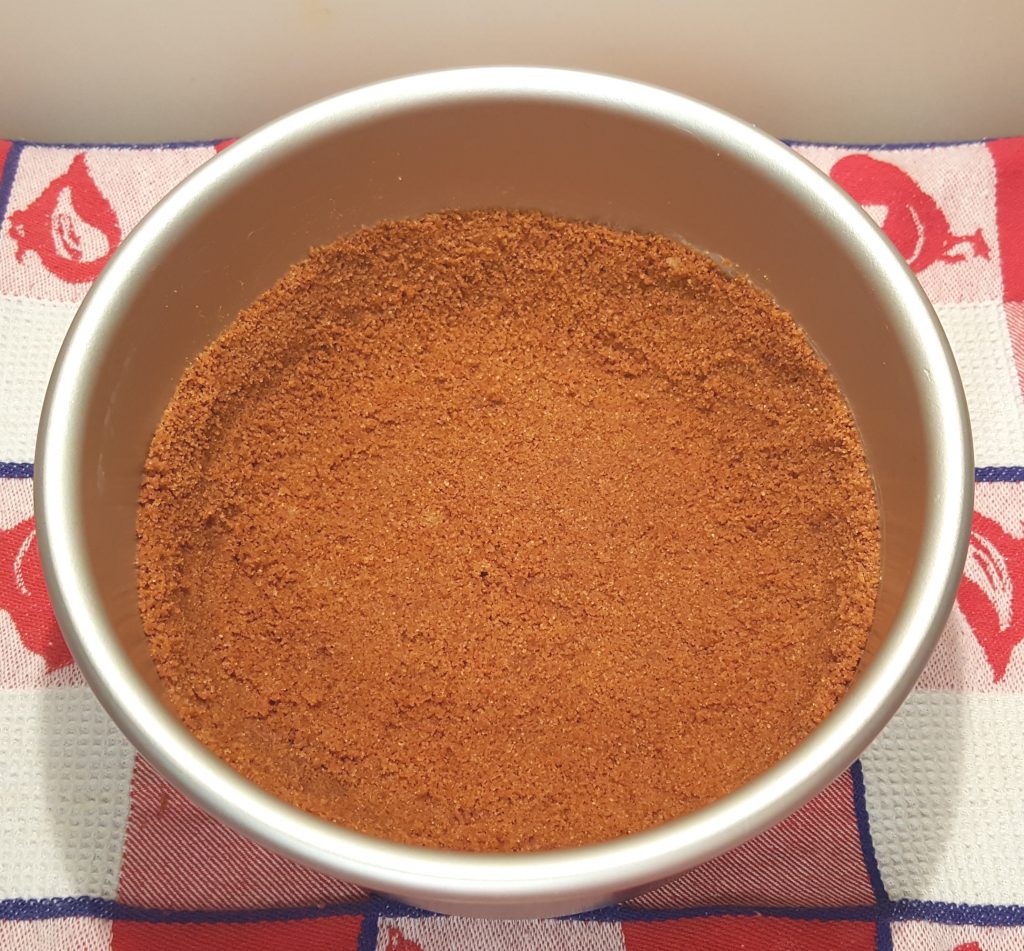
Press the crust/crumb mixture into your prepared Cheesecake Pan using a Fox Run Tart Tamper, the back of a measuring cup or your fingers. Try to form a neat border around the edge and only press slightly up the sides. The crust will seal the bottom of your Cheesecake Pan and the filling will not seep through. Please don’t wrap the bottom of your Cheesecake Pan
Do not press the crumbs too high on the sides. If the crust is exposed, the water from the Pressure Cooker will seep into the crumbs and cause a gummy crust. In addition, it will cause excess moisture/condensation to form in the filling itself.
At this point, you can either bake the crust in a 350 degree oven for 10 minutes, or, you can simply put the Cheesecake Pan with the crust into the freezer, while preparing the filling. Some people feel they get a crispier crust using the oven, but it really is not that much of a difference.
The wet environment in the Pressure Cooker won’t actually keep the crust super crisp. Plus, if you want to do a “Pressure Cooker Cheesecake,” why also use the oven? If you are going to turn on your oven, you might as well use it for the whole shebang. If you prepare your Cheesecake properly, there is no reason not to have a crisp crust.
Prepare the Filling
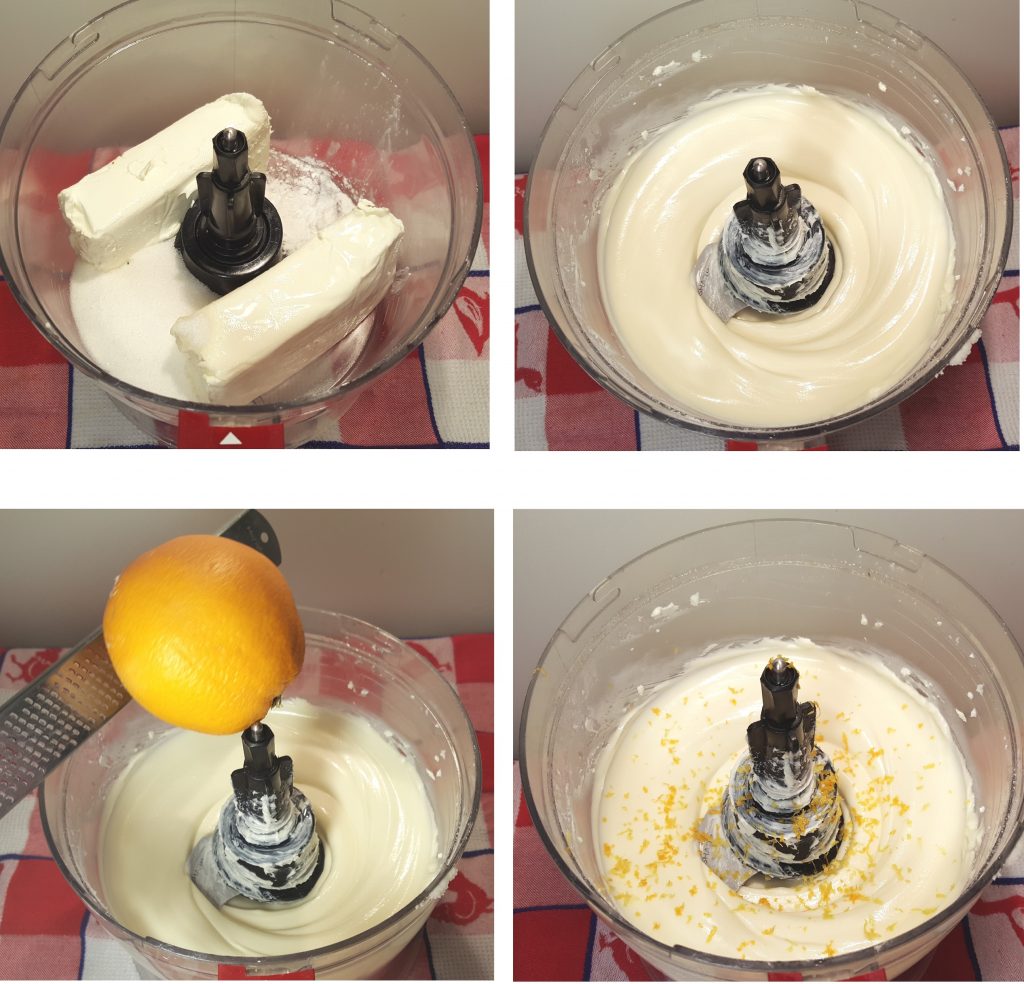
Beating a fat, such as cream cheese or butter until it’s soft, light and airy is called creaming.
Most of the ingredients are added and then “creamed” just until the batter is smooth. The more you mix the filling, the lighter and airier it becomes. Flour is used to help hold the Cheesecake together and is also used to make a denser Cheesecake. Also, not over mixing the filling, will help make your Cheesecake more dense. Just mix the filling enough so that it is smooth. Don’t continue to mix, just for the sake of mixing
Add in Cream and Eggs
To address lumps in your Cheesecake Filling – If you add eggs right from the refrigerator to a creamed fat, it will cause the fat to re-solidify, making the batter look lumpy or curdled. So, taking the chill off of the eggs will keep the fat from hardening again. Just take out your eggs at the same time as you do your cream cheese.
Make sure not to overmix the filling after you have added the eggs.
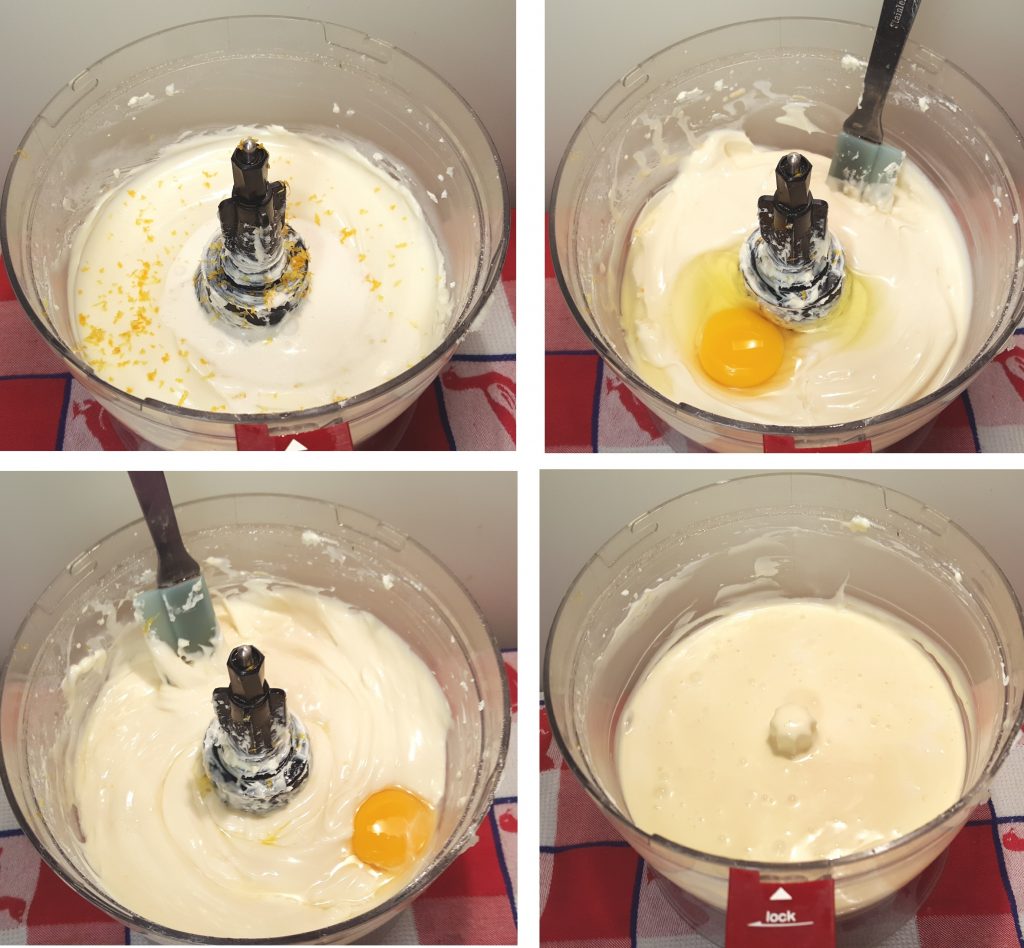
Once you are ready to add your eggs, add just one egg at a time. If using a Food Processor, just use the pulse button for one to two seconds after each egg added. If using an Electric Hand Mixer, push the button on and off and on again, until the egg is partially mixed into the filling. If mixing my hand, just mix until the egg is almost blended.
It is okay if you see some of the yellow yolk. Take a spatula and gently fold it into the filling.
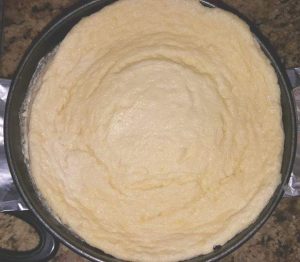
Over Worked Eggs
Over mixing the eggs, will cause the cheesecake to become very airy and will puff up like a soufflé while cooking. It can also resemble scrambled eggs.
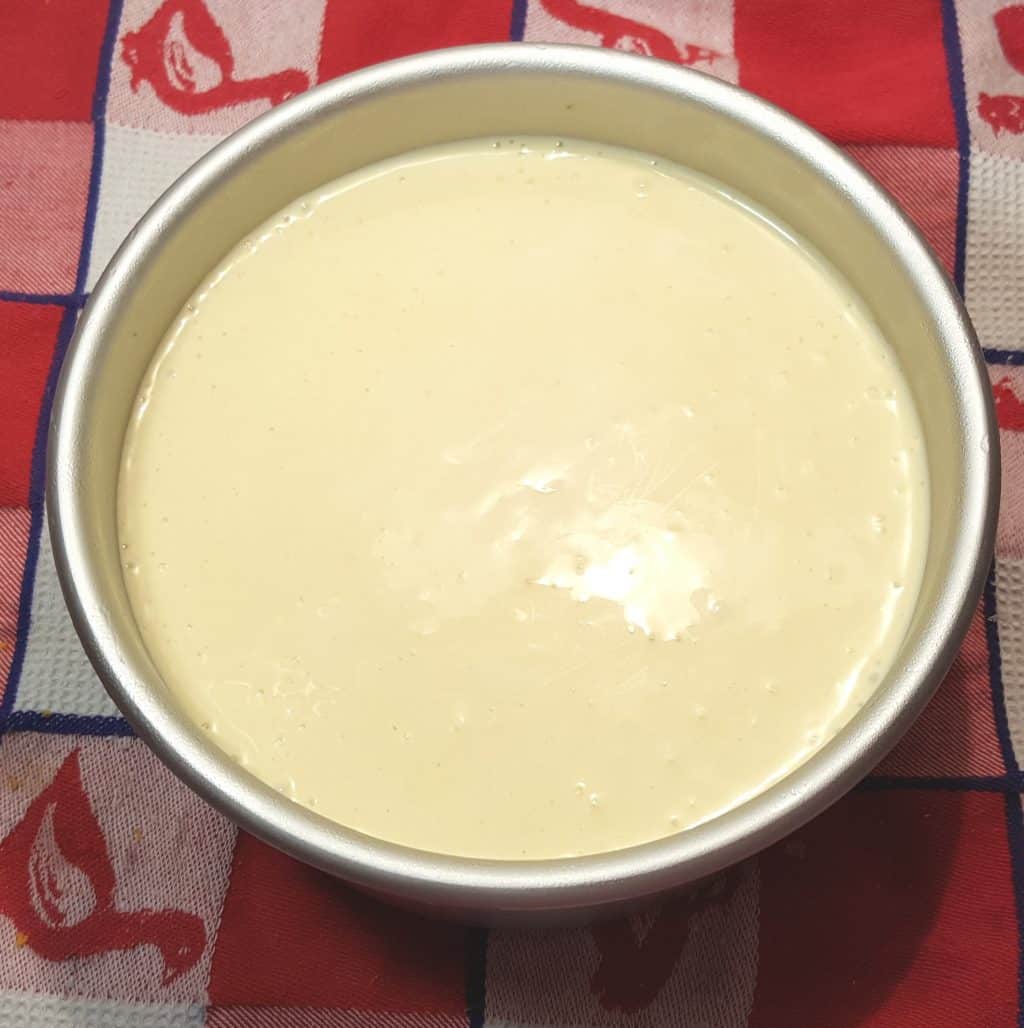
Pour the Filling into the Cheesecake Pan
You can see in the above photo, that there is no crust showing. This is what you want. Hold the pan with both hands and jiggle it a bit to help release any excess trapped air bubbles. You can also tap on the sides of the Cheesecake Pan to help release air bubbles.
If you still have a few little bubbles on the surface, use a toothpick or a fork and run it through the bubble to release the air.
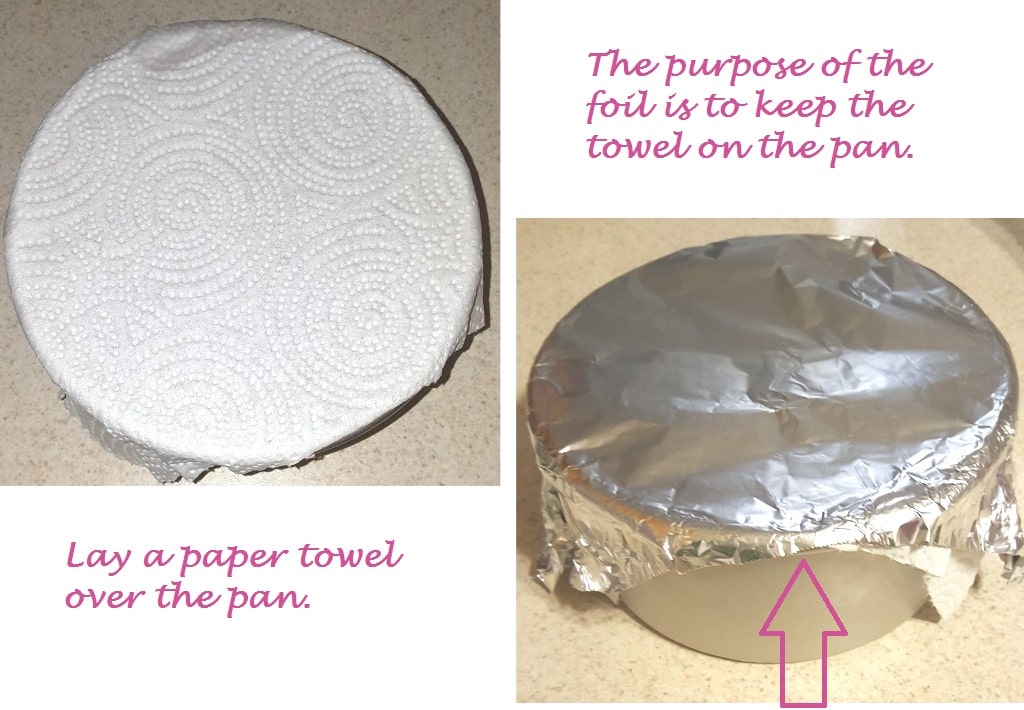
Do not secure foil tightly
I like to cover my cake pan with a paper towel and with a piece of foil, to eliminate water from landing on the cheesecake. The foil is there, just to make sure the paper towel does not fall into the cake, or blow off. The foil should be on loose and not secured all the way around.
If any moisture does end up getting on the cake, just dab it off with a paper towel.
Never, ever, ever, never ever, preheat your Pressure Cooker, when making any cheesecake, or when making any of my recipes! All my recipes take into account, the time the Pressure Cooker takes to come to pressure.
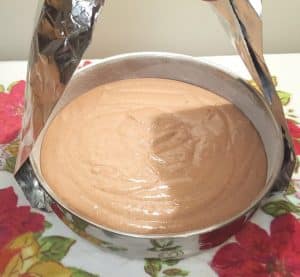
Making and Using a Foil Sling
It is cheap to make and you will find yourself using it all your Pot in Pot cooking. If you don’t want to make this Homemade Sling, you might prefer this Silicone Sling/ Vegetable Steamer which is a nice product.
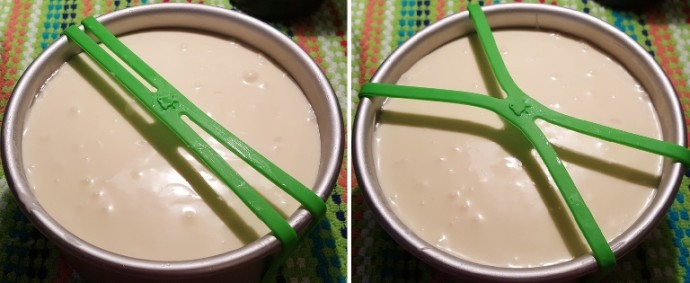
The Grafiti Bands Cross Style make it so easy to get pans and bowls in and out of the Pressure Cooker. They will hold the paper towel in place nicely. You can put the paper towel and foil over the bands, so slip it underneath, if you are careful.
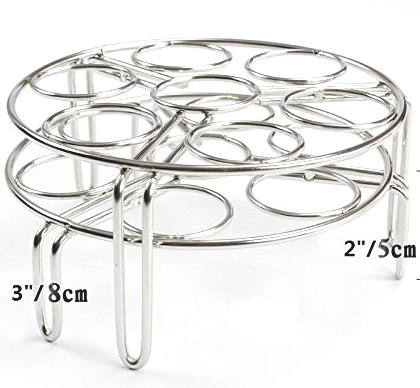
Tall and Short Legged Trivet Set for PIP and Eggs
I really like this Trivet Set, as the two different heights are perfect and serve many uses. The shorter Trivet is used for making my very popular New York Cheesecake, Hard Boiled Eggs, “Baking Cakes,” etc. The taller Trivet is perfect for making your entrée, a Pot in Pot meal, using my Pressure Cooker Perfectly Cooked Pot in Pot Rice recipe. Potatoes, carrots and other items, fit nicely in your Instant Pot or Pressure Cooker.
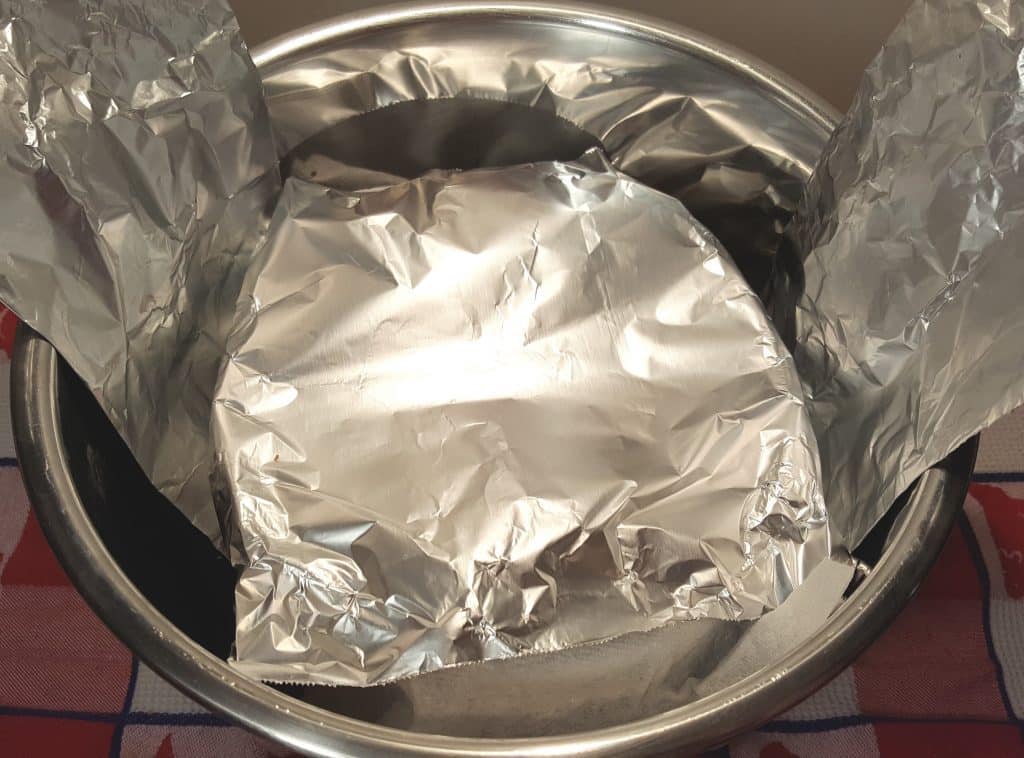
Lower the Cheesecake into Pressure Cooker
You can see that the foil and paper towel are not tightly secured on to the Cheesecake Pan. This is good!
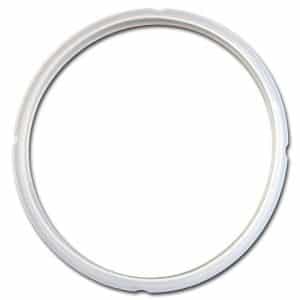
Instant Pot Silicone Sealing Ring
It is a good idea to keep one Silicone Gasket that you only use for desserts. I have several Silicone Gasket and use one for strong flavors, one for mild flavors that don’t linger and then one for desserts. So, if you have an extra Silicone Gasket, make sure you remember to use it when making Cheesecake.
Make sure your Silicone Gasket is probably situated inside the lid of your Pressure Cooker. Always check to make sure your Pressure Valve is Closed. If it is not Closed, all the water in your Pressure Cooker cooking pot will escape and your Cheesecake will not fully cook.
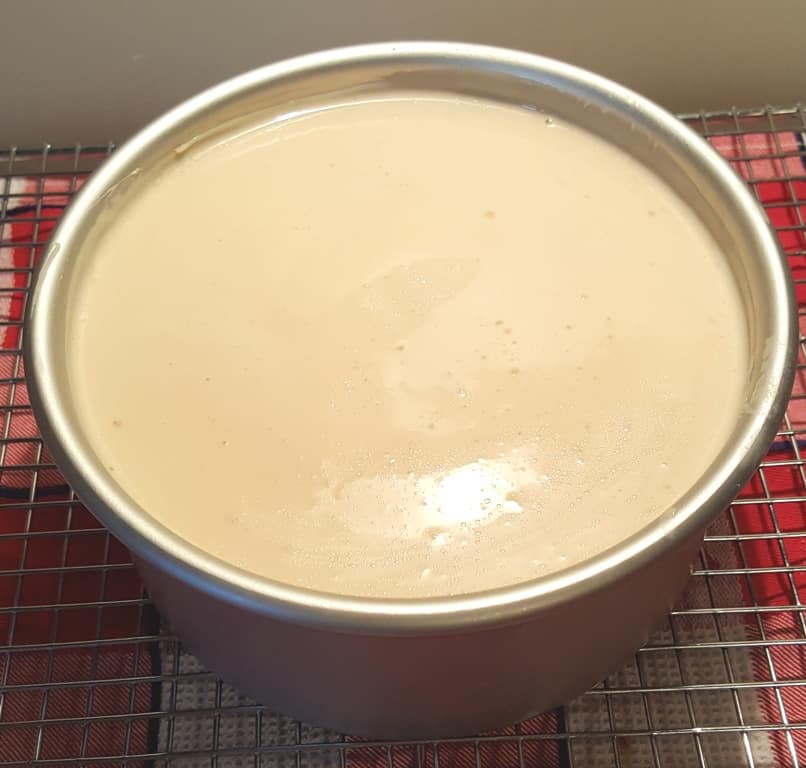
Jiggly in the center of the Cheesecake is good
Allow the Cheesecake a minimum of 15 minutes Natural Pressure Release. This means, do nothing. When you hear the Beep of the Pressure Cooker, do nothing. After 15-20 minutes, all pressure should be released. Turn the Pressure Valve, to release any remaining pressure and then open the Lid.
You can see that the Cheesecake is the same height as when we first put it into the Pressure Cooker. Cheesecakes don’t rise and fall, like a regular cake. If yours does, that is because the eggs are over worked, which will cause the rise, cracking, brown areas and then the cheesecake will fall.
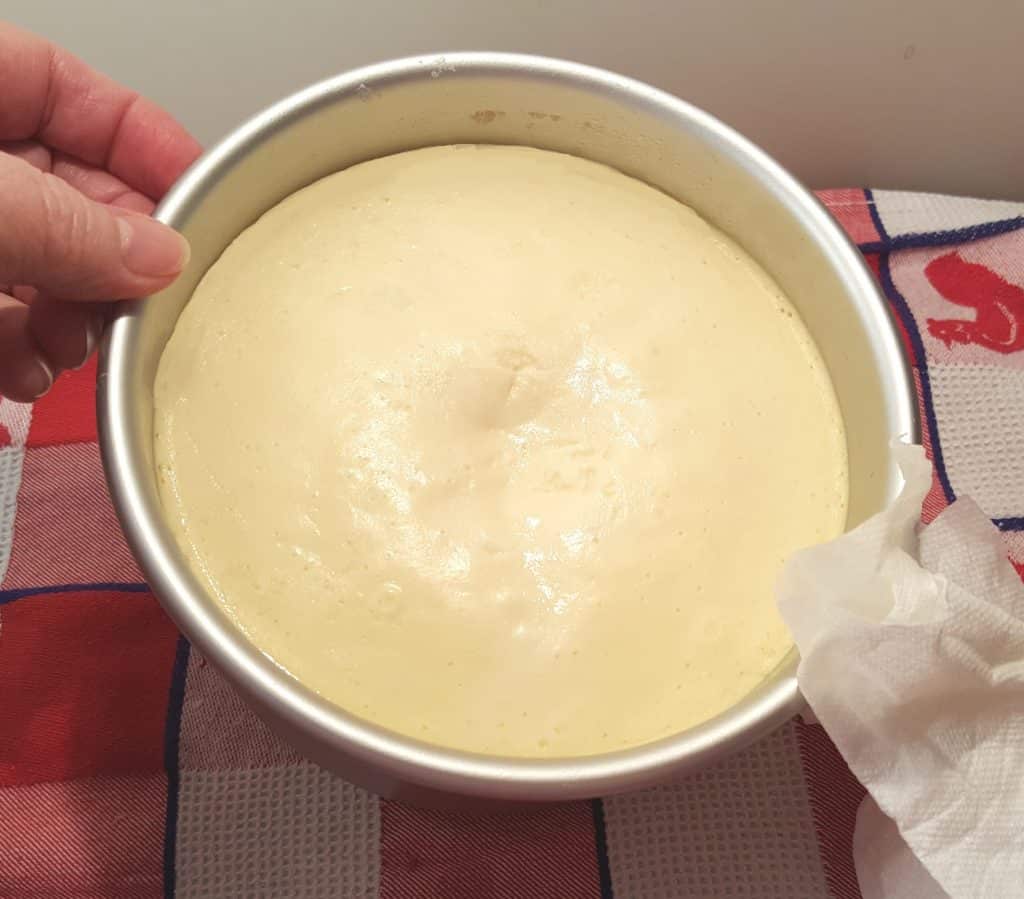
Perfect Jiggle, No Liquid Running
A cheesecake is done before the center of it is set. It will be a bit jiggly in the center (only about an inch) and the sides will be slightly higher. Jiggly means that there is some movement in the top center of the cake. It does not mean that there is liquid in the middle. There should be NO liquid at all. Don’t feel the urge to cook longer or else the top will crack.
Tilt the cheesecake a bit and use a paper towel to remove any condensation/water that got trapped under the foil during cooking. ****** Also, notice that when tilted, nothing is running out of the center and there is no sluffing of the cake whatsoever. This is a perfect jiggle.
However, if your Cheesecake has more than an inch of movement in the center, put the cheesecake back into the Pressure Cooker for and cook for 5 more minutes ,or more as needed. Under no circumstances should you end up with the final, chilled product, having a liquid center. All you have to do is cook it longer! If you see any liquid in the center, cook your Cheesecake for 3 more minutes. Make sure to do another 15 minute Natural Pressure Release.
The heat that is trapped inside will continue to cook the center while the cheesecake cools on the counter. You must leave your Cheesecake on the counter or inside the Pressure Cooker for at least one hour.
Don’t rush this process by putting your Cheesecake in the refrigerator or in cooler conditions. A Cheesecake needs to cool down slowly, to make sure that the middle continues to cook and set up properly.
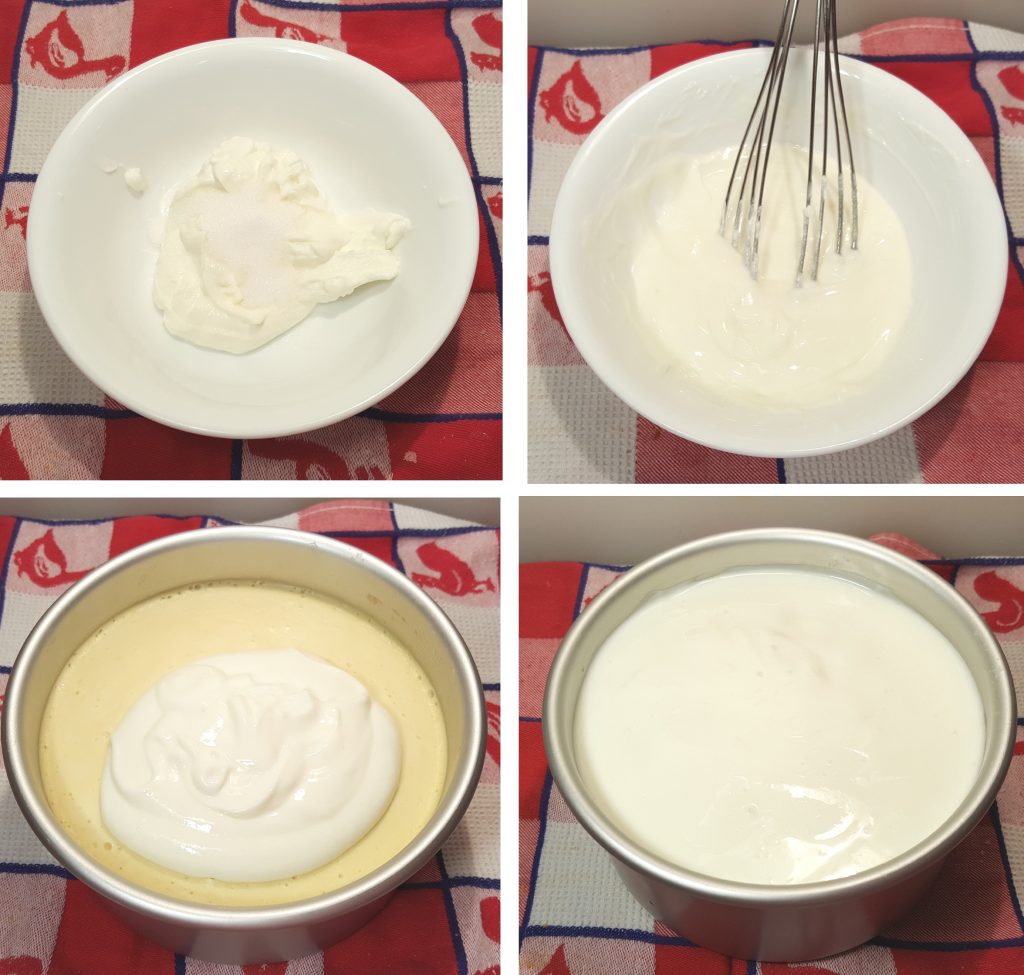
Whisk together the Sour Cream Layer
If your Cheesecake calls for a Sour Cream Layer, here are some helpful tips to get a glass like top.
Whisk together Sour Cream and sugar. This is the Completer Layer. It is not a topping. Please don’t skip the Sour Cream Completer Layer, even if you plan to add a topping. This Completer Layer will melt into this Pressure Cooker New York Cheesecake and will become one with the cake. It will add an additional layer of really yummy flavor!
Alternatively, instead of Sour Cream, you can use Homemade Greek Yogurt mixed with sugar, instead of the sour cream, if you happen to be a yogurt maker. You may need a touch more sugar though.
This is a challenge for you sour cream haters. I dare you to mix up the sour cream and sugar anyway, even if you hate sour cream. Take a small taste. Ah ha! I bet after pouring it top of your hot cheesecake, you are licking the bowl!
Pour the Sour Cream Layer onto the hot Cheesecake and spread it evenly over the whole cake. Look how nice and flat this Pressure Cooker New York Cheesecake has become in just five minutes. It is a perfect outcome.
So, after 15 minutes you will notice the Completer layer is melding with the cake and the Cheesecake is flat and glossy.
If you put the Cheesecake into the refrigerator to soon, the Cheesecake will be loose in the center. The hour or longer rest on the counter is allowing the Cheesecake to gently finish baking.
The Cheesecake will start to pull away from the Cheesecake Pan, which is good. The slow cooling method, first during Natural Pressure Release and then on the counter, allows the Cheesecake to pull away, without getting stuck to the sides and possibly cracking.
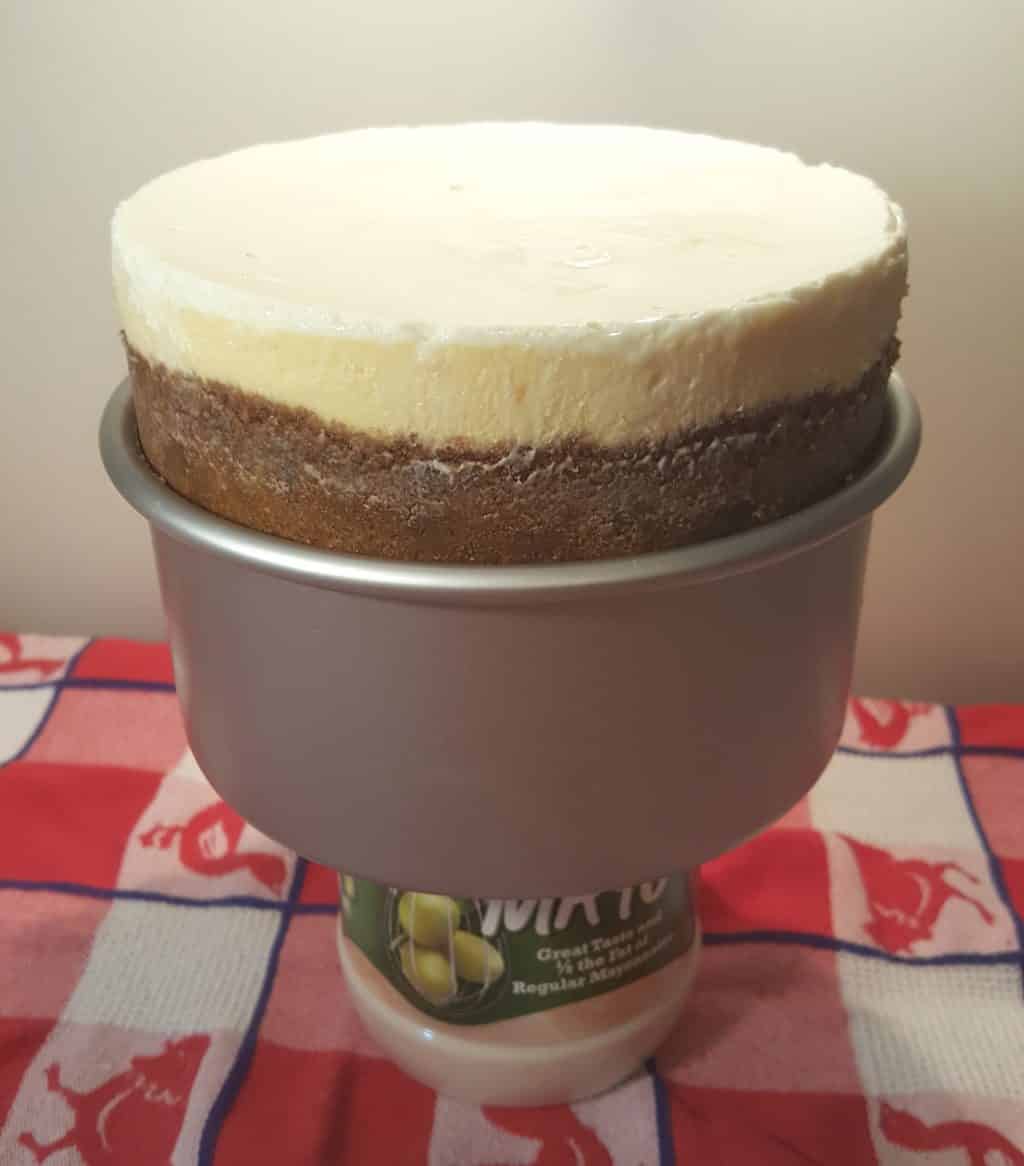
How to remove Cheesecake from Push Pan
I usually remove my Cheesecake from the Cheesecake Pan after about an hour or two of being in the refrigerator. It is your choice. If you are nervous about doing this so soon, put the Cheesecake into the refrigerator as is and then when completely chilled, remove the Cheesecake from the Pan.
Leaving the Cheesecake in the Pan overnight is fine. If you have properly greased the sides of the pan, the Cheesecake should pull away. If the pan was not greased enough, the Cheesecake will stick and will cause cracking from the pulling the Cheesecake wants to do, during cooling.
If the Cheesecake is not pulling away, after refrigeration, you will notice that the butter/grease will harden and it may be more difficult to remove the Cheesecake from the pan. A thin silicone spatula or knife run around the edges of the Cheesecake will help. Frankly, I just use force and pull the sides of the pan from the Cheesecake. I’m not overly concerned about the sides.
You will see that the Sour Cream Layer, has melted into the Cheesecake and should be flat like glass.
Any jar that will fit into the opening of the Push Pan will work.
Remember – “Don’t rush this process by putting your Cheesecake in the refrigerator or in cooler conditions. A Cheesecake needs to cool down slowly, to make sure that the middle continues to cook and set up properly.”
A Cheesecake desperately needs at least 12 hours in the refrigerator, so please, please, make your Cheesecake the day before you need it and let it set up properly in the refrigerator overnight.
It will taste much, much, much, better. Really, I am not joking. Your Cheesecake will taste good on the same day, but will taste incredible the next day.
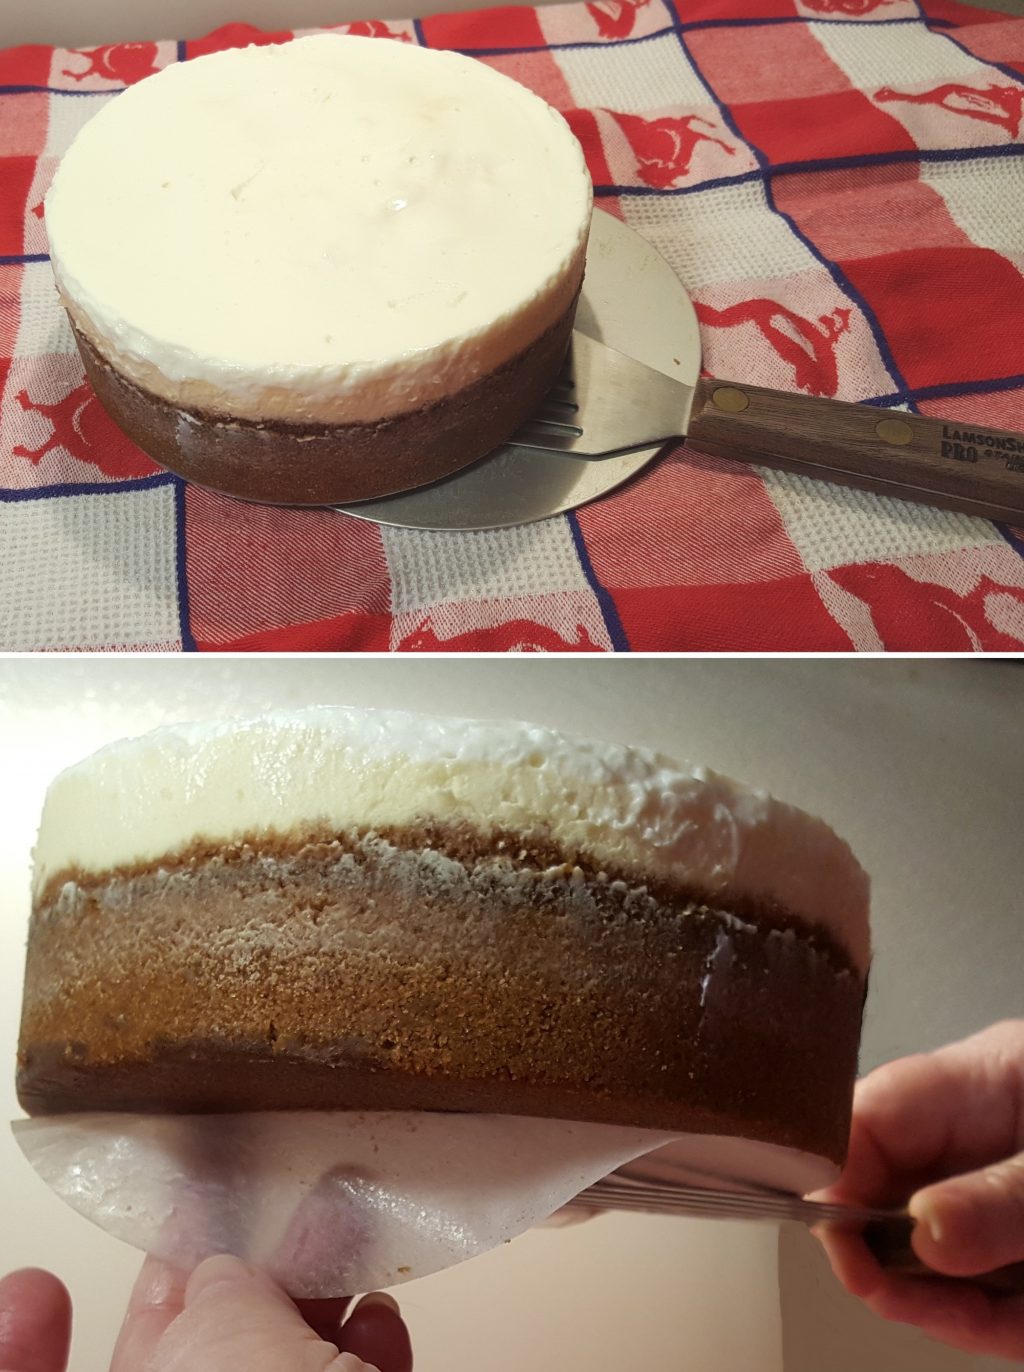
Removing Cheesecake with LamsonSharp Chef’s Slotted Turner
Using Parchment Rounds will allow you to easily life the Cheesecake off the Base. I use this LamsonSharp Chef’s Slotted Turner to remove the cheesecake to a plate. It’s super thin and fits easily between the Cheesecake and the base of the pan. The Parchment Round, peels right off the cake.
It is not a good idea to cut the cheesecake on top of the Push Pan base, as it will scratch and sticking will become a problem.
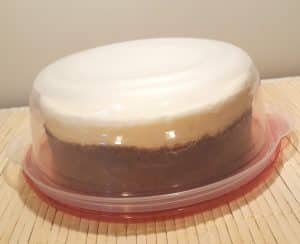
Rubbermaid Containers are great for transporting Cheesecake
Use the lid as the base for the cheesecake (see New York Cheesecake recipe for photos) and the bowl as the cover!
The Containers are cheap enough not to worry about brining the Container home!
When you want a piece of Cheesecake, just remove a slice and in 30 minutes, you’ve got yummy Cheesecake!
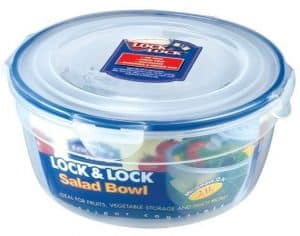
Best Freezer Storage Container
Lock & Lock is BPA free and a high quality airtight container. I use Lock & Lock for all my pantry items too. You’ve probably noticed them in many of my recipe photos.
I hope this Perfect Pressure Cooker Cheesecake Tips & Guide has made you confident to make your own Pressure Cooker Cheesecake.
After reading this Perfect Pressure Cooker Cheesecake Tips & Guide, check out these Pressure Cooker Cheesecakes.
Pressure Cooker Lindy’s New York Cheesecake
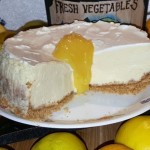
Pressure Cooker Meyer Lemon Cheesecake
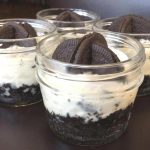
Pressure Cooker Cookies and Cream Cheesecake
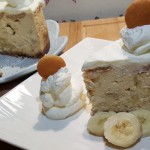
Pressure Cooker Banana Pudding Cheesecake

Pressure Cooker Blackberry Cheesecake
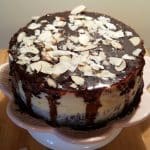
Pressure Cooker Coconut Almond Fudge Cheesecake
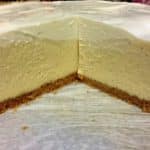
Pressure Cooker Vanilla Bean Cheesecake
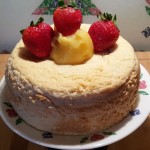
Pressure Cooker Authentic Italian Ricotta Cheesecake
Pressure Cooker Three Ingredient Japanese Cotton Cheesecake
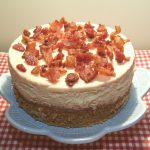
Pressure Cooker Maple Bacon Cheesecake with Candied Bacon

Pressure Cooker Red White and Blue Cheesecake Singles
Pressure Cooker Italian Meyer Lemon Ricotta Cheesecake
Pressure Cooker Happy Birthday Brownie Cheesecake
Pressure Cooker Holiday Spice Peppernuts Cheesecake and Coffee
Spider Web Halloween Cheesecake
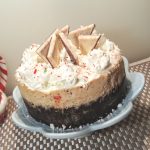
Add some Perfect Homemade Whipped Cream to your Pressure Cooker Peppermint Milkshake Cheesecake.
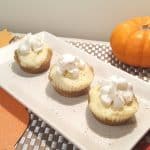
Pressure Cooker Pumpkin Muffin Cheesecake Bites
Caring is sharing! If you would like to support This Old Gal, please share this recipe on Social Media, so that I can continue to bring you more wonderful recipes!
Let me know if this Perfect Pressure Cooker Cheesecake Tips & Guild has helped you to make a Perfect Pressure Cooker Cheesecake.
Don’t forget to PIN IT
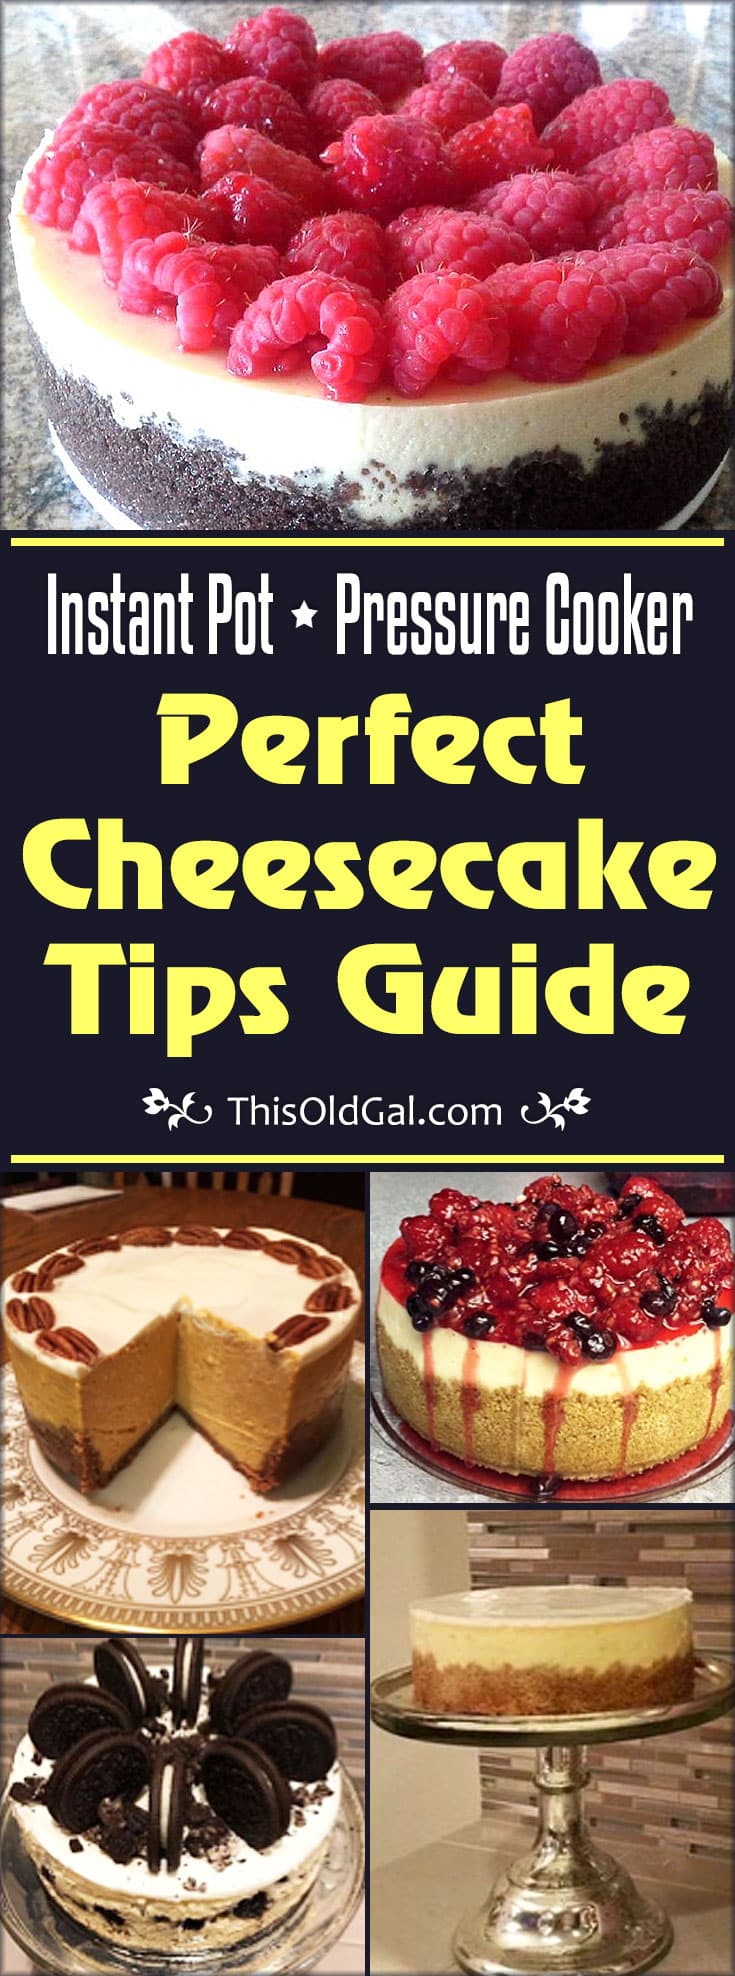
Instant Pot Perfect Pressure Cooker Cheesecake Tips Guide



Hi Jill,
I saw Fox Run Tart Tamper and absolutely cracked up! I am childish like that!🤣
It sounds like some strange British party like “Tarts and Vicars” but with foxes too!
Thanks for the giggle!
Karen
You are welcome, Karen. Hehehe.
Honestly, I think you should change your site name to “thiswisegal”…thank you for blessing the rest of us with your wisdom. Appreciate the sharing very much!
Awww, thanks, Patty, what a sweet comment. Jill
Jill I really like your cheesecake tips and I refer to it everytime that I make cheesecakes but I would really like to see a printable version Is that possible?
Hi Jeannine. Thanks so much. Since this page you are referring to is not a recipe, there is no recipe card and therefore no print option, but let me see if I can figure something out for a print option. Jill
Thank you
I don’t have a trivet set so I took the handles off the thing that came with my pot. Will that be elevated enough to cook properly? I have everything out and to temp and just realized this! Ugh!
I improvised, also, and used balled up foil with upside down silicone cupcake liners. Did this in a panic but it worked just fine! Haha!
I find it hard to find the list of ingredients like a other recipes. Just a simple list of all the ingredients. I’ve yet to see it. I clicked on go to recipe and it is not there just the strip by step but not the specifics.
There is a link for it right next to the picture of the rubbermaid container. Do it. You will be so glad you did.
I want to add some fresh cranberries to the batter. So I “cook” them a little first or will the cook time for the cheesecake be ok?
Cook time is the same, just add them in. Adjust the sugar for the sour berries. Jill
I have another question. Why is it bad to wrap the bottom of your cheesecake pan? I always do, so water from the bottom of the pot doesn’t seep in.
I’ve made a few IP cheesecakes. My problem is that after a couple days the crust/bottom starts “weeping”. What can I do to solve this issue? Or is it a normal thing to have happen? Thank you!
It’s normal. Jill
Thanks for all your advise on making cheesecake in an Instant pot. I”m new at this but little I have done I love my 8 quart IP Lux. Every year at Christmas I make 6″ cheesecakes ( many varieties) and put in tins to give away. My question is can I do 2 cheesecake pans at the same time? Can I put a lid between to stack? What would my cooking time be? Hopefully you can help. Thank you for any advice, Rosi Johnson
If they fit, no problem. Time wouldn’t change. Jill
Should the “keep warm” function be turned on or turned off during the 18 minute time of “natural pressure release?” Before I started the 38 minute cook time, I turned the “keep warm” onto the “off” position. It cooked for 38 minutes then I let it sit for 18 minutes and there was no pressure left to release after the 18 minutes were up.
On. Jill
Well, it still tasted delicious so fortunately not too much harm done.
Loved this guide! So informative!
Thanks, Connie. Jill
I purchased the silicone pan with the glass bottom and found that it was very difficult if not impossible to close the side of the pan therefore making it leak. I also like the pan you use.
Thank you so much for the instructions for making your cheesecake! It was invaluable!
Thanks, Patsy. I love that pan too! Jill
A must read before attempting cheesecake in any Multipot, IP, etc. Always refer newbies to this guide. It’s a must, if you want awesome results.
I love Jill’s cheesecakes, but always refer to this guide before I start.
Thanks Jill
Thanks
I have an 8qt duo and an 8″ pan. How much better should I increase and how long do i cook?
That information is at the bottom of every one of my cheesecake recipes, in the notes section. Because the cook times varies on the recipes, I can’t give you an answer without knowing which recipe. Jill
Thanks for all the info. I am new to trying to make a pressure cooker cheesecake. When I tried at the top of my cheesecake was not nice and smooth like yours is there anything I can do to fix this problem ? Thanks!
Does the cheesecake need to be covered while cooling in the refrigerator overnight?
You mention in your cheesecake guide using Grafiti Bands X Cross style to help make it easier to lift pans out of the IP. I love this idea, but curious what is the correct size to order to fit around a Fat Daddio 7×3 pan. I don’t want to buy a large assortment of sizes I won’t use. Thanks!
I made your cheese cake awhile back and it was great. What advice to you have If I wanted to modify this recipe so that I could add both peanut butter and chocolate to make a “Reeses Peanut Butter Cup” cheesecake. It sounds great to me.
Hi Bill. You could add pieces of Reeses for topping and a scoop of peanut butter to the batter. Maybe make a chocolate crust. Jill
Your cheesecake looks yummy. How do you keep the crust from getting soggy?
I am also wondering the same thing. I never had soggy crust with the spring form pan, but definitely do with the push pan. I’m so frustrated.
Hi Alysha and ESmith. The post above talks about the crust and how not to have it come out soggy. Jill
Thank you for a great set of tip! But, I did not see any info about how to adjust for different sized IPs or pans.
I have an 8 quart instant pot and an 8″ Fat Daddio push pan. Should I double the batter? Or reduce the cooking time?
Thank you
Absolutely solved all the problems I encountered with making a “perfect” Cheese Cake. Thanks so much for the details.
That is great, Jerry. I am so glad my article has helped. Jill
Besides cry, what should I do if I accidentally did a quick release instead of NPR?
No worries, just don’t open the pot. Jill
Having trouble figuring out what size pot you use for the cheesecake…6 or 8 quart? I can’t find a pan that fits my 6 qt t.
The pans are linked in the recipe and at the bottom of all posts, it talks about what pot was used. Cheesecake can be made in any size pot. Jill
Read all the comments to make sure this hadn’t been asked. What changes need to be made for using the jars instead. I was thinking of using the little glass jars from the French yoghurt I bought. Do you still do the paper towels on top of the jars? Does the cooking time change? Thanks for any response or suggestions.
Awesome recipe. Made 6″ cake with tofu (fake) cream cheese and sour cream. Used coconut milk instead of heavy cream. HUGE hit! Two thumbs up! Thank you for sharing this on www.
A few people have asked me for the recipe, but don’t have pressure cookers. Can they bake this recipe in a regular oven? If yes, at what temperature and for how long?
Thank you!
Alan
Toronto, Canada
Recipe was outstanding and easy to follow. Used tofu (fake) cream cheese and sour cream. Tasted awesome. Substituted heavy cream for coconut milk. Huge hit!
A few people have asked me for recipe, but they don’t have a pressure cooker. They’re wondering if they can bake this in oven? If yes, at what temperature and for how long?
Thank you!
Alan
Toronto, Canada
Can I sued freezer paper or wax paper instead of parchment paper?
I made the cheesecake. I used a hand mixer in a deep bowl to pulverize the graham crackers, which was a terrible idea because cracker pieces flew all over the counter and floor. So I had to make a little extra. Instead of adding 2 eggs and one egg yolk, I mistakenly added 2 eggs and both the yolk and white of the third egg. It made no difference; the cake came out dense and delicious. I also forgot to add a round of parchment paper on the bottom of the pan. To remove the cake I ran a length of dental floss between the bottom of the cake and pan and the cake slid off cleanly. I thought it was a lot of work for such a small cake, but the cake is so rich that I cut narrow pieces and serve with fresh berries on the side and itt serves quite a few. Jill, this recipe is a winner!
Marcia, after all the mishaps, I am so glad you enjoyed the recipe so much. Thank you for telling me. Oh, a food processor really is a must have. Jill
It said the recipe was available after the pictures but I don’t see it
Hi! I have a 7 inch Fat Daddio’s cheesecake pan. Will your recipe for the New York Style cheesecake work in this size pan…thank you.
Can you use an XL Pressure cooker ? If so what setting do you use?
Thank You
This is a pressure cooker recipe, so any pressure cooker can be used. Jill
Hi, Jill! I can’t wait to try your cheesecakes in my IP. I just pre-ordered your book; are these tips included in the book? Most importantly—ARE THOSE BISCOFF-LIKE COOKIES IN YOUR CRUST (Evil Genius)?! Thanks for sharing your culinary gifts with the world. (Incidentally, I’m a Bengal breeder, and I *love* Tonks!)
I do use Biscoff sometimes. Yum. Bengals are beautiful. Jill
I can’t tell you how grateful I am that you took the time to write this. I have never seen this information anywhere else and I can see how it will make a world of difference. I’m off to give it a try. I read this while waiting for the eggs and cheese to warm up. Thank you SO much again for this article.
Hi Linda. Thank you so much for your kind words and I am so glad it has been helpful. Which cheesecake are you making? Jill
Don’t understand. You say to get the tips and I can’t find how and somehow I got the New York cheesecake recipe printed out. I really don’t know how. I don’t want to do any thing illigal, but find that there is nothing plainly stated on how to do this. I got the 6″ springform pan and am anxious to bake this cheesecake. But really would like a printed copy of your tips.
You should first read the page on the tips and then go to the other page for the cheesecake and follow the recipe, which is on the recipe card at the bottom of the page. Jill
Convert to pdf.
How can I get the recipe for the cheescake
Hi Jill,
I tried your recipe and just got it out of the IP. My cheesecake looks like a Souffle! =(
What did I do wrong?
Thanks for sharing your recipe!
Can you tell me if the cheesecakes can be made in a stovetop pressure cooker ? Are the timings interchangeable for the stovetop pressure cooker and the InstantPot?
Hi Jill, So excited to find your page. I just got the 6 quart Ultra. I read on a FB page to also order a few “must haves”. I ordered the 2 piece egg / trivet set, extra seals, 2 of the 7″ x 3″ Fat Daddio push pans and those silicone molds to make egg bites. Is this tips page a printable page? It is full of great tips. I would love to print it out for a go to reference sheet. How many different cheesecake recipes have you come up with? The pictures are making me hungry! Thanks for all of the great information!
If you are going to add something like oreos or toffee – do you still use the same amount of lemon and orange peel?
Thanks!
Hi DM. I would omit the citrus. Jill
Can I use 1/3 less fat cream cheese?
Also what can I use besides a trivate? I need one asap and don’t know where to find one except online.
Thank you.
I have been making different cheesecakes in my pressure cooker and i do put the paper towel and foil on top. In having a problem with the foil falling down on to the cheesecake so that when i remove the fools and paper towel, the paper towel has stuck to the cheesecake. What can i do to prevent that??
Hi Chrissy~ If you pull the paper towel and then the foil tight at the ends, it should stay up. Jill
When you use a casserole dish or cheesecake pan inside the InstaPot, does it have to be placed on a rack and does it have to have WATER in the bottom of the InstaPot since there is no way for liquid to get the pot up to pressure? I did not know if the absence of liquid would break the dish.
Water = pressure. Jill
Love your website. Just received an Instant Pot, 8 qrt.
Tried to make NY Cheesecake in an 8 in (8 in exactly) springform pan. Would not fit in the Instant Pot because of the spring clip on the side. So now it is in the over. So disappointed
Charlie, this is one of the reasons that I recommend the Push Pan. You can use a larger size. I don’t like the spring forms. Jill
I read all through the tips and suggestions for making the perfect cheesecake, but I cannot find the actual recipe with ingredients I should use. Is that posted somewhere on your site? Thanks
There are many cheesecake recipes on the blog, just do a search or click on one of the cheesecake photos. Jill
I agree, this is frustrating. I hoped there was a basic cheesecake recipe in with all the great tips in this page.
Hello!
I have a 7″ x 3″ push pan i was going to try masking a cheesecake in. Would i need to adjust cooking time in my IP? I see you use a 6″ x push pan.
Thanks for your help.
Cheryl
I need to know this too! I also have a 7″ pan.
Qestion:
Looking for a Copy Cat Recipe for CARROT CAKE CREAM CHEESE like The Cheese Cake Factory, I find plenty of Recipes on line, but needing to know how to make it in my IP since it has Batter in it. As far as Times, water and and all that.
I just finished making this cheesecake, and the Oreos that I originally placed in the middle all rose to the top. It looks good and smells good. Have you ever had this happen? Wondering if this is a result of overmixing?
Katie, it happens and is fine. Enjoy. Jill
Which recipe was used for the dark crust with raspberries on top that is used in your pictures?
Just about to purchase a Instant Pot and found your site. Everything I want to begin my Instant Pot adventure! Except, I am an old-fashioned girl and print out everything so it is handy, and cannot find a way to print your recipes without all the ads. Am I missing something??? Did not want to comment, but cannot find a way to email you.
I used the Instant Pot silicone springform pan and it worked great. I can’t wait to make another. The sides are soft so you have to be careful when handling it. It released easily and my Meyer Lemon Cheesecake (loved it) looked spectacular.
I have a Instant Pot 8 quart pot. What is the largest size dadio springform pan I can go with? Sounds like most people go with the 7inch. I’m just wondering if I could use the 8 inch?
Beth, if using the push pan that I link to in the recipe, you can do an 8 inch in the 8 quart. Once you click the link, you will see a size option. The springform pan takes up more room because of the spring action. Jill
Regarding the crème fraîche. Do you recommend using real crème fraîche? If so, should I mix it with the cream cheese, or just how should I include it with the cheesecake?
No, I recommend the ingredients listed. Jill
Great, thanks.
What size cross bands do you use for the cheesecake pan?
made the cheesecake yesterday. I used the silicon pan from instapot. I have not tasted it yet, but it looks delicious . I added the 5 minutes as suggested, but I think it did not need it. Cake was not jiggly.
How do you cut your cheesecake without mutilating it? I want to make several and then put them together in a variety pack, but when I try to cut them, I basically ruin them. Thank you??
Hi Andrea. Partially freeze the cheesecakes before cutting. Then use waxed paper between the slices. Jill
Thank you so much for your help! I will try this! Two more quick questions… Do you use a regular knife to cut it? And do you wrap the wax paper around the knife for the first cut or do you cut first and then put the wax paper between? Again, thank you for sharing your expertise with us! 🙂
How much time is required to partially freeze?
Thanks
I want to make ny cheese cake and I have mini pans 3 can fit in my instant pot. What would be time to pressure cook my cheese cakes?
Hi, what size Instant Pot and cheesecake pans are best? Do you place the trivet and the cheesecake pan in the stainless steel cooking pot?
These recipes are very helpful, I just got my insta pot and needed to know more how to use
Have you ever used a silicone lid (the ones they sell to cover bowls) to cover the cheesecake while it is cookingninstead of the foil? They are reusable. Just a thought, much easier to just place it on the top.
Yes. Jill
We loved the Zuppa Toscano soup! Going to try your New York Cheesecake next….. Really liked the Tips & Guide info also.
Thank you, Caroline. I am glad the info was helpful. Let me know how your cheesecake turns out. Jill
Grifiti Band Joes Cross Style …what size do I order for an 8in loose bottom pan and do I need all the others that come with that link?
Hi Carole. The larger size work for 8 inch pans. You don’t need the smaller ones unless you plan on making single serving items. Jill
Hi! If I bake this in an 8 inch in my 8 qt would I double everything or what measurements do you recommend? Ive done this once already and it was an utter disaster.
Hi Tonya. It depends on the recipe you are using. Check out my New York Cheesecake, as it shows measurements for the 8 inch pan. Not all recipes can be doubled for the 8 inch. The Bourbon Cheesecake, for instance, if doubled, would need a 9 inch cheesecake pan. Jill
I do not have an electric pressure pan but I do have an old fashioned Mirror Matic pressure pan that I have the choice of 5, 10 and 15 lbs pressure. When the recipe says cook on high can I still se my pressure pan and cook at 15 lbs pressure?
Sure wish I could have copied this article.
Can this article be printed…..please!
Your information is so helpful. Thank you
Thank you, Amy. Happy cooking. Jill
I bought an instapot just to make cheesecakes. My first one yesterday was a disaster, I didnt discover your website yet!
Anyway, i only had a 7 inch springform pan and the cheesecake was very skinny, looked like a pie. Also, the crust was soggy and stuck to the parchment. When i cut it, the crust stayed on the pan. Hmmm, i used oreos as my base.
Should I have put foil under pan when cooking to avoid soggy crust? I have since ordered some of your recommended products online.
Thanks in advance.
Mary
Ps where do you find cheesecake recipes for instapot?
Hi Mary~
The article will answer all your questions. Have fun cooking.
Jill
Hi Mary~
So glad you found my site. If you search for cheesecake, you will see my recipes. After reading these tips, I bet your first cheesecake using my recipe will be perfect. Please let me know. Jill
I so wished I could print this article. I’d love to staple it to a copy of the recepie.
I feel like I read everything, your post and others, and then followed all steps in your post to try to make my first cheesecake in my instant pot. I have the 8inch spring form – so I doubled the recipe and cooked high pressure for 40 min -did a natural release and when I opened up the cooker I have a mess. This stuff has blown up all over the place- it’s fluffy – not at all looking like a dense cheesecake. It looks more like very fluffy scrambled eggs. I have no idea what I did wrong or if there is any way to fix this.
Looking at the finished product of my cheesecake I am assuming the eggs were over mixed even though i tried not too. Question is: how can I tell if it’s done with the overmixing.?
I bake a lot so I should have known better. Room temperature cream cheese and eggs. So not really thinking, when it came time to add the heavy cream, I opened the refrigerator and added the chilled amount. Lumps. They can’t really be un-done either at this point. It is cooling now. I am hoping this will not effect the creamy texture too much. Still on a learning curve I guess!
Hi Jill – would it be possible to make the NY cheesecake in the individual silicon cupcake liners you used for the pumpkin cheesecake muffins? If so what changes would you make to the recipe?
Hi Jill, Can you cook 2 cheesecakes at one time in the pressure cooker? If so, would you increase the cooking time?
I didn’t think my original question posted. Disregard this one.
Thanks!
I made a cheesecake in my IP the other day and was letting it NR but the keep warm function was still on. Is this correct or do I need to hit cancel when it beeps and then let it NR? Thanks in advance!
Jill, have you made 2 cheesecakes in the instant pot at the same time? If so, what trivet did you use? I have been looking for a tall trivet but unable to find one. I did click on the link above for the trivet set you have but it looks like it is taking me to another set. Thanks and I have tried the cheesecake and it is delicious!
Hi Sharon~
That link should be okay now. I’ve done more than one mini at a time. Jill
I read everything but cannot find the ingredients list. I for one cannot wait for your cook book!
Marla, you need to choose which cheesecake you want to make and then click on the link.
Jill
Hello,
I have a Emeril by T-Fal pressure cooker.
I am curious if I can make this recipe in it?
I realize you prefer the instapot-but does your recipe correspond to other electric pressure cookers?
Thanks for your help!
Hi Christy~
All my recipes are for all pressure cookers. Recipes are not pressure cooker brand specific. Just like cooking in the oven. Oven recipes work in a GE oven, LG, etc. Any recipe that gets cooked in the oven can be made in any brand of oven.
Jill
Hi I need some advice for my next cheesecake… I made the cheesecake today in what I think was an 8 inch springform pan. I measured across the middle of the pan and it was 8 inches. I’m not sure if that’s how I was supposed to measure it? Anyway, I doubled the ingredients like the recipe said. The batter filled the pan to less than an inch from the top. It was so full that I could not get a paper towel and foil over it without the paper towel ending up in the batter. So I ended up cooking it uncovered in the oven in a water bath. It looks like it came out good but I really wanted to make it in the IP. I’m not sure what I did wrong….measured the pan wrong? Maybe I shouldn’t have doubled the recipe? Is the pan supposed to be that full? Could I have cooked it without the paper towel? I really want to try again in the IP.
Hi Amy~
Less than an inch from the top sounds right. Perhaps a larger paper towel. Jill
Excited to make a cheesecake for my hard-working hubs.. can I use the trivet that was included with my 6 quart Instant Pot?
I make a really good cheese cake. How can I adapt it for a pressure cooker? I have an instant pot would appreciate your input.
Hi! I made one of your cheesecakes and it was LOVELY. My husband however, likes a smaller ratio of cheesecake to crust. I used a 6 inch pan, and was wondering if you had a recipe for that size pan with only 1/2 the amount of batter? I know I could buy a 7 inch pan, but I don’t think it will be enough to change the height of the cheesecake enough. What do you think? Any ideas?
Hi Monica~
You could always make one half of the recipe. The 7 inch pan does make a difference in ratio.
Jill
I followed the recipe to make this with my 6 inch Fat Daddio pan. For some reason when I poured the batter into the crust the batter was all the way to the top of the pan. I cant figure out how I got more? It made it impossible to cover with paper towel.
Alisha, it sounds like the eggs were over mixed.
Jill
I have an 8 quart IP and would like to make this recipe using an 8 inch springform pan. I plan to double the recipe. How much time would this then take in my IP?
GoWise chat gave me this link after I asked what size spring pan fits in the GoWise 8 quart. However, the only information I see is for the Instant pot. Can you advise size for the GoWise?
Lindie, for the 8 quart GoWise, you can use up to an 8 inch pan. This article is for the GoWise too, as I have the GoWise and the Instant Pot. The pans I like are on this page. My preference is the Push Pan.
https://thisoldgal.com/favorite-pressure-cooker-accessories/
Jill
Found it. Never mind
Have scrolled up and down for awhile and cannot see where it says how much water or how long to cook it as my ready cheesecake sits on the counter ☹️
This article was so helpful! Having just received my pressure cooker, one of the first things I made was a Caramel Macchiato Cheesecake. It came out perfectly – my husband says it’s the best cheesecake he ever had! Thank you!
Thank you for the detailed instructions. I want to make the largest cheesecake possible in my pressure cooker. How much room should there be between the cake pan and the side of the pressure cooker?
I have the 8 QT Instant Pot, getting ready to purchase the Fat Daddio 8×3 inch cheesecake pan. Should I double the cheesecake recipes using this pan or 1 1/2 the recipe or prepare as written? Thank you so much for this tips / accessory links article. It is probably one of the most helpful things I have read so far.
Hi Karen~
Thank you for your message. For an 8 inch pan, I would double the recipe. Add some time to the cook time.
Jill
How much time should I add? ?
Where can I find the ingredient list for the NY cheesecake recipe?
Jon, there is a link in the article and just search the blog for other flavors too. Here is it is.
https://thisoldgal.com/pressure-cooker-new-york-cheesecake/
Have fun!
Jill
How much water in the bottom and does the pan sit in the water or on a trivet?
From the recipe:
Add 1.5 cups of water to the bottom of your pressure cooker and then place a trivet inside the pot.
What kind of a trivet?
Hi Anna~
I posted about the Trivet in the article and also provided a link. This is my choice for best Trivet. https://thisoldgal.com/product/B01NA6H0WR/US/tog00-20/
Jill
I put mine in for 5 more minutes. Do i npr again?
Hi Yona~
Yes, another natural release.
Jill
If I used the fat daddio 3inch x 3inch pans and had 3 – 6 in my IP at a time, would I still cook for 15 minutes and then 15 minutes of NPR? Or should I decrease the time?
Thank you so much for this article!!!! Everything I needed to know all in one place!
Jill this was awesome. Thanks for sharing. I am curious do you ever make cheesecake in mason jars? Any specific tips there?
Hi Connie~
Thank you. I do make them in mason jars. The time for different size jars are at the end of all the cheesecake recipes. Plus, there is a recipe specific for the 4 oz jars.
Jill
Do you pour on the sour cream topping an hour or 15 minutes after you take it out of the cooker? It says to leave it on the counter for an hour to finish cooking, but then it says after 15 minutes pour on the topping. Also, is there a way to print this off? TIA
Carey, put the topping on after 15 minutes. Then let it sit out for an hour.
Jill
Jill, I thoroughly enjoyed reading your Perfect Pressure Cooker Cheesecake Tips & Guide. It was like a private Cheesecake lesson, a tour guide to Cheesecake perfection. People pay good money for cooking lessons like this.
I totally appreciate the time and effort you put into educating, inspiring, and motivating us. I know I speak for your other followers, as well.
Hi Jan~
Thanks so much for your kind comments.
Jill
Jill just wanted to let you know that the link to the NY Cheesecake wasn’t working from this page. When I did a search I was able to find it that way.
Hi Michelle~
Thanks so much. It is now fixed. 🙂
Jill